
How to Fix Water Damage to Interior Finishes: Step-by-Step Guide
- Understanding Water Damage to Interior Finishes
- Assessing the Damage and Safety Considerations
- Repairing Water-Damaged Drywall
- Restoring Water-Damaged Ceilings
- Replacing Water-Damaged Flooring
- Real-Life Examples and Tips
1. Understanding Water Damage to Interior Finishes
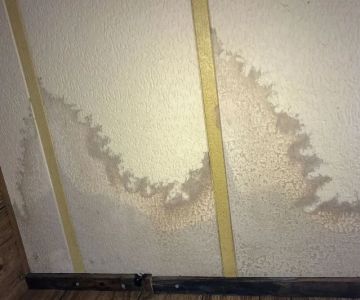
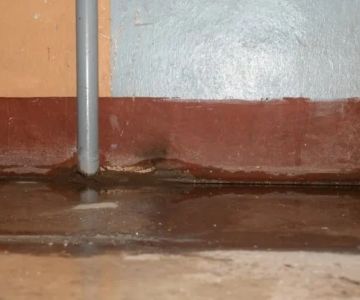
Water damage can wreak havoc on the interior finishes of your home, including drywall, ceilings, and flooring. It typically occurs from leaks in the roof, plumbing issues, or flooding. Once water makes contact with these surfaces, it can cause staining, mold growth, and weakening of structural materials.
The first step in dealing with water damage is understanding its impact on different materials. Water-damaged drywall can become soft and crumble, while water-soaked wooden flooring can warp. Ceilings may show visible stains or even sag under the weight of absorbed water. Identifying the extent of the damage will help you determine the best course of action for repair.

SERVPRO of Pompano Beach / servpro fort lauderdale south
Pompano BeachBroward CountyFlorida
2101 NW 33rd St #200a, Pompano Beach, FL 33069, USA
2. Assessing the Damage and Safety Considerations
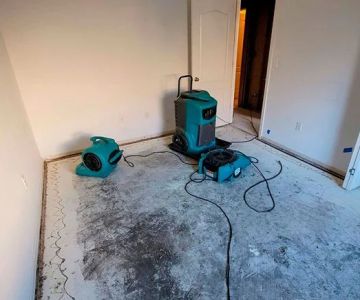
Before diving into repairs, it’s essential to assess the damage thoroughly and ensure your safety. Start by turning off the water source and ensuring the affected area is dry and free of standing water. If the damage is extensive, consider calling a professional restoration service to prevent mold and mildew growth, which can occur within 24–48 hours in moist environments.
Additionally, check for structural damage. If the water has infiltrated through the roof or walls, there may be underlying issues that need to be addressed before you begin repairs. Don’t forget to wear protective gear, such as gloves and a mask, to avoid exposure to mold spores or contaminated water.

Kustom US Restoration / kustom restoration
1215 W Houston Ave Suite A, Gilbert, AZ 85233, USA
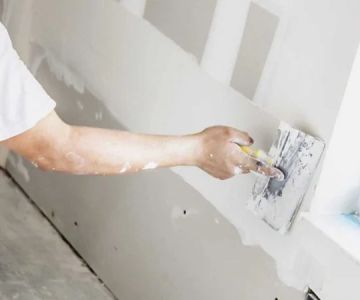
3. Repairing Water-Damaged Drywall
Repairing water-damaged drywall can be a straightforward process if the damage is minimal. For small water stains, a simple cleaning may suffice. However, if the drywall has become swollen or softened, you’ll need to replace the affected section. Here’s how:
- Remove Wet Drywall: Cut away the affected drywall using a utility knife. Be sure to remove any moldy or soft areas.
- Dry the Area: Use fans and dehumidifiers to completely dry out the area before replacing the drywall.
- Install New Drywall: Cut new drywall to fit the space and secure it with drywall screws. Then, tape and mud the seams, sand smooth, and repaint as needed.
Replacing water-damaged drywall is essential for maintaining the structural integrity of your home. It’s important to ensure the area is dry before proceeding to avoid further issues like mold growth.
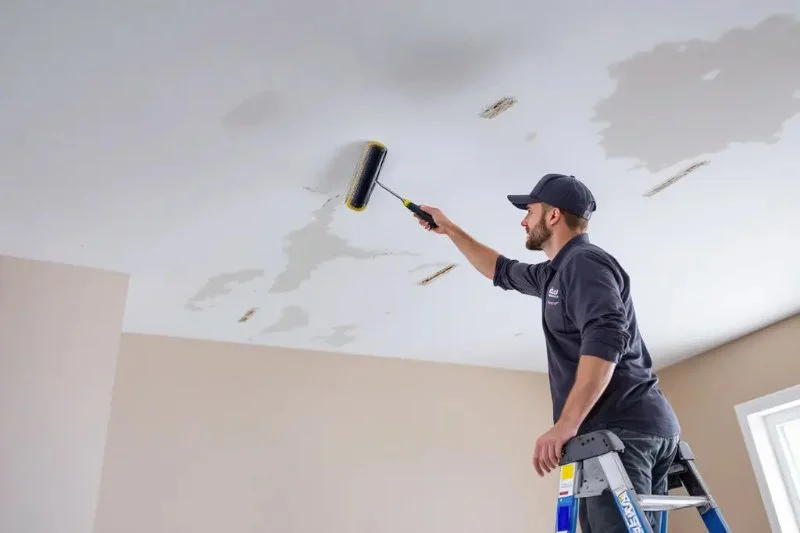
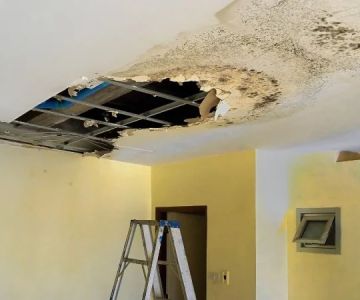
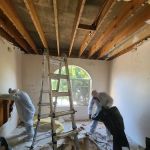
4. Restoring Water-Damaged Ceilings
Water-damaged ceilings often show signs of staining or sagging due to absorbed moisture. Restoring them can be a bit more challenging, as it involves ensuring the integrity of the ceiling structure is not compromised. Here’s what you should do:
- Inspect the Ceiling: Check for any soft or sagging spots in the ceiling. If the damage is minor, you may be able to simply paint over the stains after ensuring the area is dry.
- Repair Major Damage: For severe damage, it may be necessary to replace part of the ceiling. Remove any damaged drywall or plaster and follow the same steps as drywall repair for installation and finishing.
If the ceiling has been compromised by a roof leak, make sure to address the root cause of the problem before proceeding with repairs. Otherwise, the damage may recur.
5. Replacing Water-Damaged Flooring
Water-damaged floors, whether wood, tile, or carpet, can often be the most difficult to repair. The first step is to dry the area thoroughly using fans and dehumidifiers. If the damage is limited to surface staining, you may be able to clean the floor with the appropriate products. However, if the water has caused warping, swelling, or mold, you’ll need to replace the affected flooring.
For hardwood floors, you may need to remove and replace planks that have been warped beyond repair. If your carpet is water-damaged, it’s often best to replace it entirely, as mold and mildew can develop under the surface. In cases of tile floors, you may only need to replace grout or individual tiles.
6. Real-Life Examples and Tips
Let’s look at a couple of real-life examples of homeowners dealing with water damage:
- Example 1: The Johnson Family's Basement Flooding The Johnsons experienced a basement flood after a heavy rainstorm caused their sump pump to fail. They had to replace the drywall, clean the carpets, and reapply water-resistant sealant to prevent future issues. They found that timely action—removing wet materials quickly—helped prevent mold growth.
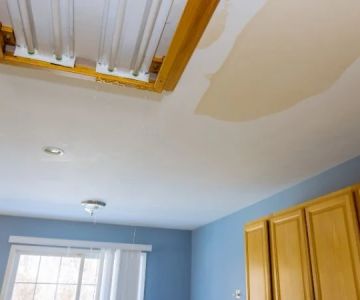
- Example 2: Emma's Ceiling Water Damage Emma noticed a water stain on her kitchen ceiling after a plumbing leak. After repairing the leak, she followed the steps to restore the ceiling, removing the damaged drywall and replacing it with new material. With proper drying and sealing, she was able to restore the ceiling to its original condition without further issues.
These real-life examples show how addressing water damage early can make a significant difference in preventing further damage and ensuring a successful repair process.
 Allegiance Restoration & Services5.0 (7 reviews)
 Roto-Rooter Plumbing & Water Cleanup4.0 (2218 reviews)
 58 Foundations & Waterproofing4.0 (123 reviews)
 SERVPRO of Waipahu5.0 (12 reviews)
 Dakota Fire and Water Restoration4.0 (5 reviews)
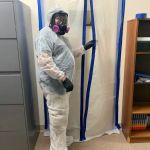 Master Restoration Guys5.0 (9 reviews)
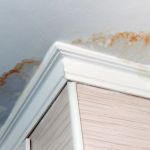 How to Handle Water Damage From Ceiling Leaks
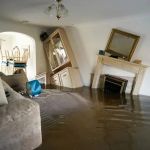 What to Do if Your House is Flooded from a Broken Pipe: Essential Steps to Take
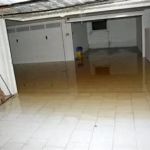 How to Handle Water Damage Restoration in Your Car Garage
 How to Minimize Water Damage in Your Home During Winter
 Never Attempt DIY Water Damage Repair in a Flooded Home – The Risks & Benefits of Professional Help
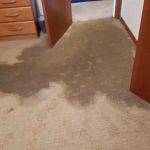 Water Damage Repair for Soggy Carpets: Causes, Risks, and Solutions