
What It Really Takes to Bring Bathroom Walls Back After Water Damage
- damage-assessment-basics - how to evaluate water damage severity
- drying-and-moisture-control - stopping hidden moisture early
- mold-prevention-strategies - protecting indoor air quality
- wall-repair-and-replacement - restoring structure and finish
- real-restoration-case - practical homeowner experience
- long-term-protection - preventing future bathroom damage
Understanding What Happens When Bathroom Walls Get Water Damage
When homeowners search for how to restore water-damaged bathroom walls, they are usually dealing with a situation that feels more serious than it looks on the surface. Bathroom walls absorb moisture gradually, and by the time visible staining appears, the internal structure may already be affected.
Water damage typically begins with small leaks—behind tiles, around plumbing fixtures, or from condensation buildup. Over time, this moisture seeps into drywall or plaster, weakening structural integrity and creating an environment where mold can grow.
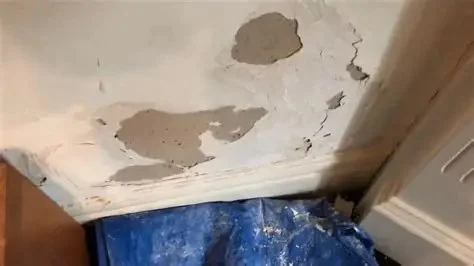
The most important thing to understand is that water damaged bathroom walls are rarely just a surface issue. The visible damage is often only a symptom of deeper moisture problems inside the wall cavity.
Giants / dry kings restoration of san francisco
San FranciscoSan Francisco CountyCalifornia
685 Geary Blvd, San Francisco, CA 94102, USA
Step One: Identifying the Real Extent of the Damage
Looking Beyond Surface Stains
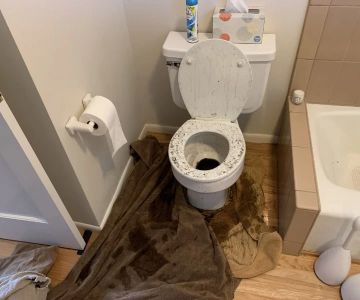
The first step in any effective bathroom wall restoration process is determining how far the moisture has spread. Discoloration, bubbling paint, and soft drywall are obvious signs, but they don’t always reveal the full scope.
In many cases, homeowners underestimate the damage because the wall still feels “mostly solid.” However, moisture meters used by professionals often reveal hidden saturation areas extending beyond the visible stain.

SERVPRO of Pompano Beach / servpro of santa maria
Pompano BeachBroward CountyFlorida
2101 NW 33rd St #200a, Pompano Beach, FL 33069, USA
Checking Adjacent Areas
Bathroom water damage rarely stays in one place. Moisture can travel horizontally through insulation and framing, especially in older homes where waterproof barriers are limited or degraded.
A homeowner in Atlanta once discovered that a small leak behind a shower wall had affected an entire adjacent hallway section before any visible signs appeared. This is why early inspection matters.
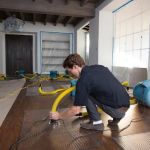
Step Two: Stopping Moisture and Drying the Structure
Immediate Moisture Control
Before any repair begins, the source of water must be stopped. This could involve fixing a leaking pipe, resealing a shower joint, or addressing condensation issues.
Without stopping the source, any attempt at repair becomes temporary. This is a critical stage in the bathroom leak repair process.
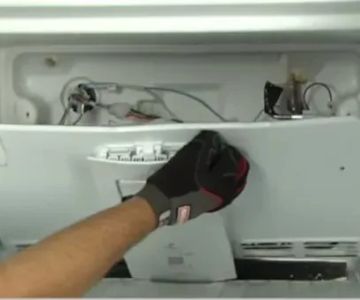
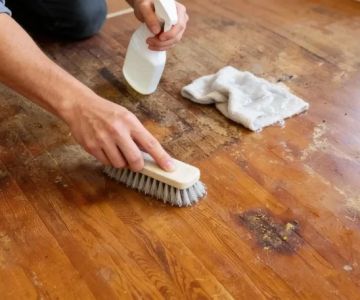
Proper Drying Techniques That Actually Work
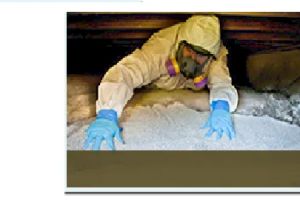
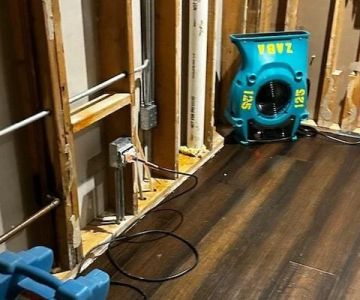
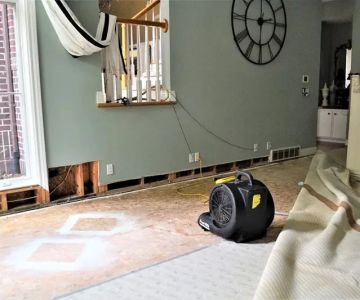
Drying is not just about wiping surfaces. Effective wall drying techniques involve air circulation, dehumidifiers, and sometimes partial wall removal to expose hidden moisture.
Professionals often use industrial fans to create continuous airflow for several days. This prevents trapped moisture from becoming a breeding ground for mold.
Why Mold Becomes the Biggest Hidden Threat
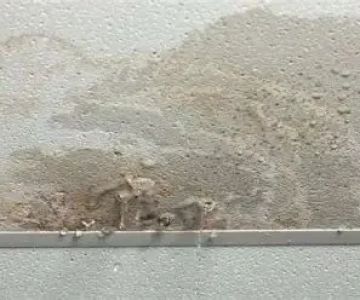
How Mold Develops Inside Walls
Once moisture remains inside drywall for more than 24–48 hours, mold growth becomes a real risk. This is one of the most concerning consequences of mold removal bathroom walls situations.
Mold doesn’t just affect appearance—it can also impact indoor air quality and trigger respiratory issues, especially in poorly ventilated bathrooms.
Real Case Example: Hidden Mold Discovery
A homeowner in Chicago noticed a faint musty smell but saw no visible damage. After opening a section of the bathroom wall, contractors discovered extensive mold growth behind the tile layer caused by a slow plumbing leak.
The repair required full wall replacement and antimicrobial treatment, highlighting how hidden moisture can escalate quickly if ignored.
Step Three: Repairing or Replacing Damaged Wall Sections
When Drywall Can Be Saved
If damage is minor and caught early, affected drywall sections may be dried, treated, and refinished. However, this only works if structural integrity remains intact.
Surface staining alone does not always require full replacement, but soft, crumbling, or swollen drywall almost always does.
Full Replacement for Severe Damage
In more advanced cases, complete removal of damaged sections is necessary. This ensures that hidden moisture pockets are eliminated and prevents future deterioration.
New moisture-resistant drywall is often installed in bathrooms to reduce the risk of recurring issues.
Step Four: Restoring the Bathroom’s Finish and Appearance
Priming and Sealing Properly
Once repairs are complete, proper sealing is essential. Specialized primers help block any remaining stains and prevent moisture absorption.
This step is often overlooked by DIY repairs, leading to recurring discoloration or paint peeling over time.
Matching the Original Design
Homeowners often want restoration to blend seamlessly with the rest of the bathroom. Matching paint texture, tile patterns, and grout lines ensures a consistent final appearance.
Long-Term Protection Against Future Water Damage
Improving Ventilation Systems
One of the most effective prevention strategies is improving bathroom ventilation. Exhaust fans reduce humidity levels and prevent condensation buildup on walls.
Routine Plumbing Inspections
Regular checks of pipes, shower seals, and faucets can prevent small leaks from turning into structural damage. This is where platforms like Reliable Damage Hub can help homeowners find guidance, services, and restoration solutions before issues escalate.
Using Water-Resistant Materials
Modern bathroom renovations often include water-resistant drywall, vapor barriers, and mold-resistant paint. These materials significantly reduce long-term risks.
Real Homeowner Experience: From Damage to Full Recovery
A homeowner in Florida experienced severe bathroom wall damage after a hidden pipe leak went unnoticed for weeks. Initially, only minor paint bubbling was visible, but behind the wall, insulation was fully saturated.
After a full restoration process involving drying, mold treatment, and wall replacement, the bathroom was rebuilt using moisture-resistant materials. The homeowner later noted that early detection would have significantly reduced repair costs and disruption.
This example shows why understanding how to restore water-damaged bathroom walls is not just about repair—it’s about prevention and early action.
 TX Water Damage Restoration of Boynton Beach5.0 (7 reviews)
 TLC Mountain Home Services5.0 (238 reviews)
 SERVPRO of Wellington South4.0 (50 reviews)
 SERVPRO of Claremont/Montclair4.0 (31 reviews)
 Peninsula Restoration5.0 (2 reviews)
 DRYmedic Restoration Services of Greater Fairhope5.0 (15 reviews)
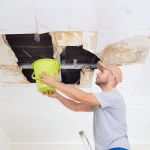 Comprehensive Guide to Water Damage Repair for Office Ceilings
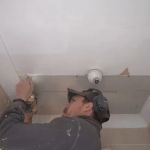 How to Repair Water-Damaged Drywall: Step-by-Step Guide
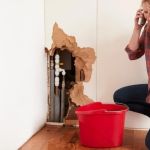 How to Deal with Water Damage from a Burst Pipe: Expert Tips for Homeowners
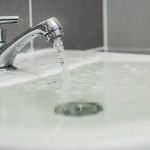 How to Deal with Water Damage from an Overflowing Sink or Bathtub
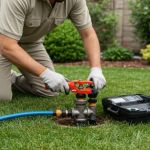 How to Prevent Water Damage from Sprinkler System Leaks
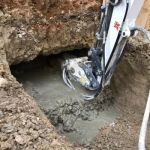 How to Repair Water Damage Around Home Foundations: A Step-by-Step Guide