
Restore Your Hardwood Floors: A Step-by-Step Approach to Water Damage Repair
- assessing-damage - evaluating the extent of water damage and identifying affected areas
- drying-and-preparation - removing moisture and preparing hardwood surfaces for repair
- sanding-and-leveling - restoring surface smoothness and eliminating warped sections
- filling-and-patching - addressing cracks, gaps, and deeper water damage
- staining-and-finishing - applying stains and protective layers for a polished look
- preventive-maintenance - tips to avoid future water damage and prolong floor lifespan
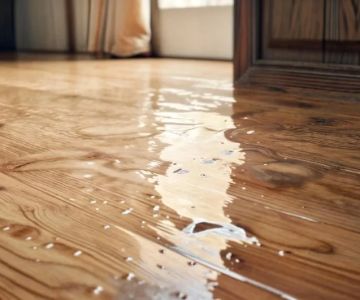
1. Assessing Water Damage on Hardwood Floors
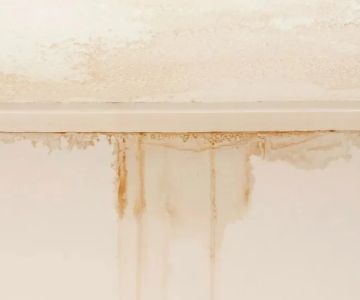
The first step in any successful repair project is understanding the scope of the damage. Water damage can range from minor surface warping to deep structural compromise. Start by inspecting the floor for discoloration, cupping, buckling, or soft spots. Checking under rugs, near sinks, and around windows can reveal hidden damage that might worsen over time.
In one real-life scenario shared by a homeowner on Reliable Damage Hub, a minor spill behind the refrigerator went unnoticed for weeks. By the time it was detected, several boards had begun to warp. Early assessment could have prevented the costlier repair that followed.

SERVPRO of Pompano Beach / servpro of santa maria
Pompano BeachBroward CountyFlorida
2101 NW 33rd St #200a, Pompano Beach, FL 33069, USA
2. Drying and Preparing the Hardwood
Removing Excess Water
Before any repair work begins, it’s crucial to eliminate all moisture. Use wet-dry vacuums to extract standing water and then employ fans and dehumidifiers to dry the room completely. Depending on the severity, this process may take 24–72 hours. Moisture meters can help determine whether the floor is truly dry enough to proceed safely.
Giants / dry kings restoration of san francisco
San FranciscoSan Francisco CountyCalifornia
685 Geary Blvd, San Francisco, CA 94102, USA
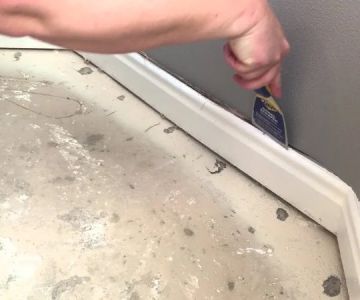
Preparing the Surface
Once dry, remove baseboards and any molding around the damaged area. This allows easier access to the boards and prevents trapping moisture. Sanding or lightly scraping the surface may be necessary to remove stains or residual water damage.
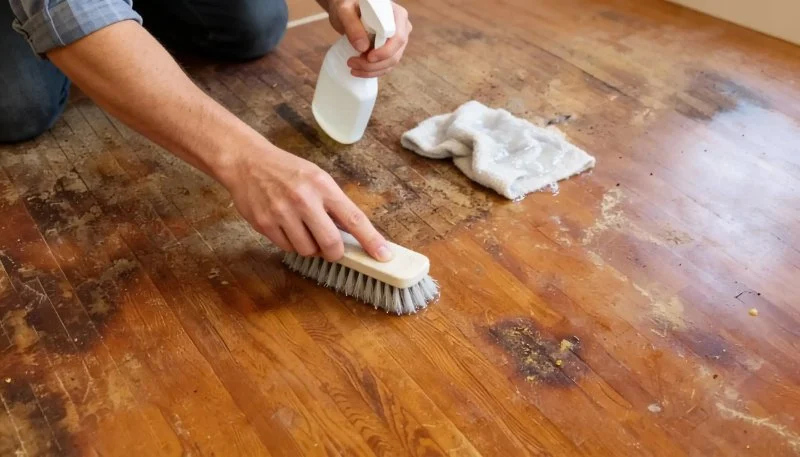
3. Sanding and Leveling Damaged Sections
Water can cause hardwood to swell, cup, or buckle. Sanding helps level the surface and prepares it for refinishing. Start with coarse-grit sandpaper for major imperfections, then gradually move to finer grits for a smooth finish. In cases of severe buckling, individual boards may need to be removed and replaced.
Professional restorers often emphasize sanding in the direction of the wood grain to maintain natural aesthetics and prevent further scratches.
4. Filling Cracks and Patching Deeper Damage
Small cracks or gaps caused by water can be filled using high-quality wood filler. For boards with structural compromise, patching may involve replacing sections entirely. When selecting filler, choose a product that closely matches your wood’s natural color to ensure a seamless repair.
A homeowner on Reliable Damage Hub shared that carefully matching the filler to the existing stain resulted in a nearly invisible repair, even after multiple years of wear.
5. Staining and Finishing the Restored Floors
Once repairs are complete, it’s time to restore the floor’s visual appeal. Apply stain to match the existing color and then seal with polyurethane or other protective finishes. Multiple coats may be necessary to achieve durability and uniform appearance. Always allow adequate drying time between coats to prevent peeling or uneven surfaces.
6. Preventive Maintenance Tips to Avoid Future Water Damage
Repairing water-damaged hardwood floors is time-consuming, so prevention is key. Here are actionable steps to protect your investment:
- Use area rugs in high-risk zones like kitchens and bathrooms.
- Regularly inspect plumbing fixtures and under-sink areas for leaks.
- Maintain consistent indoor humidity levels to prevent expansion and contraction.
- Clean spills immediately to prevent absorption and staining.
- Consider professional sealing every few years to add an extra layer of protection.
Case Study: Transforming a Flood-Affected Living Room
In one instance, a small basement flood caused extensive water damage to a living room floor. The homeowner followed a step-by-step approach: rapid drying with industrial dehumidifiers, removing severely warped boards, sanding, and then staining and sealing. Within a week, the floor looked nearly new. The key takeaway was systematic action and patience.
Professional Insights for Reliable Hardwood Floor Restoration
Experts recommend using moisture meters at every stage to prevent hidden issues. Choosing high-quality sandpaper, filler, and finishes also contributes to long-term durability. For complex water damage, consulting a professional can ensure safety and optimal results. Reliable guidance and high-quality materials make all the difference when following a step-by-step guide to repair water-damaged hardwood floors.
For tools, materials, and professional services specifically tailored for hardwood floor restoration, Reliable Damage Hub offers trusted recommendations and detailed guidance for homeowners and DIY enthusiasts alike.
Final Thoughts on Restoring Hardwood Floors
Repairing water-damaged hardwood floors requires careful assessment, thorough drying, precise sanding, strategic patching, and high-quality finishing. Following a systematic, step-by-step approach not only restores aesthetic beauty but also extends the floor’s lifespan. With preventative maintenance and attention to detail, homeowners can enjoy their hardwood floors for decades without recurring water damage issues.
 Unity Restoration5.0 (3 reviews)
 Elite Clean Restoration4.0 (88 reviews)
 Roto-Rooter Plumbing & Water Cleanup4.0 (6624 reviews)
 Virotect Restoration LLC4.0 (61 reviews)
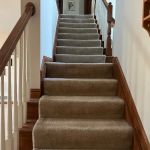 King of Kings Carpet Cleaning5.0 (505 reviews)
 SERVPRO of South Louisville, Northwest Louisville and SERVPRO of Southwest Jefferson County5.0 (73 reviews)
 How to Remove Mold After Water Damage
 How to Choose the Best Water Damage Restoration Company Near You
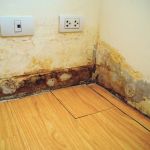 How to Spot and Prevent Water Damage in Your Walls
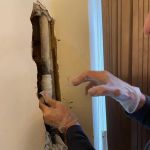 How to Repair Water Damage from Pipe Leaks Inside Walls
 How to Handle Water Damage From Sewer Backups – Steps for Cleanup & Prevention
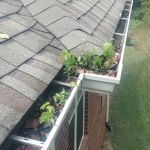 How to Prevent Water Damage From Clogged Gutters: Tips and Solutions