
- - identifying refrigerator leak water damage early signs
- - shutting down and securing the appliance safely
- - removing water and drying affected areas properly
- - repairing kitchen flooring and structural materials
- - preventing mold growth after appliance leaks
- - assessing long-term damage and hidden moisture
- - real homeowner case of fridge leak disaster recovery
- - professional insights and restoration best practices
1. Identifying Refrigerator Leak Water Damage Early Signs
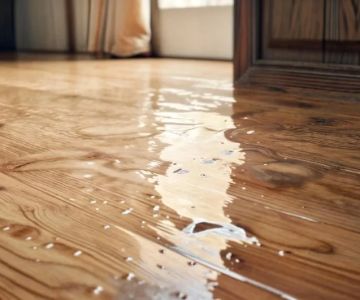
Refrigerator leak water damage often begins subtly, making early detection extremely important. Many homeowners first notice a faint musty smell near the kitchen floor or slight discoloration around the base of the refrigerator. These small indicators often signal that water has been slowly escaping from a faulty water line, clogged defrost drain, or malfunctioning drip pan.
Understanding how to repair water damage from refrigerator leaks starts with recognizing these early symptoms before they escalate. Water tends to travel beneath flooring materials, meaning visible surface dryness does not always indicate safety. Laminate, vinyl, and hardwood floors are particularly vulnerable, as moisture can seep underneath and remain trapped for days or even weeks.
In many real-world cases, homeowners only discover the issue when flooring begins to warp or lift. At that point, damage has already extended beyond the surface, requiring more extensive restoration efforts.

SERVPRO of Pompano Beach / servpro of santa maria
Pompano BeachBroward CountyFlorida
2101 NW 33rd St #200a, Pompano Beach, FL 33069, USA
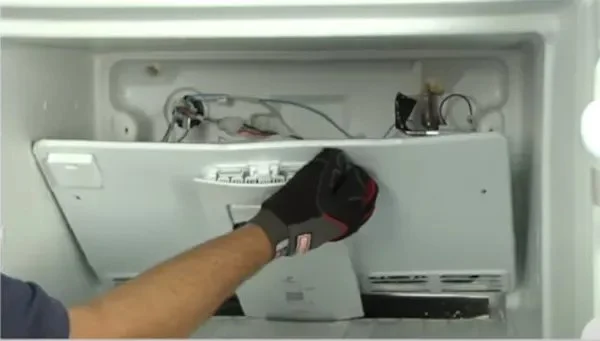
2. Shutting Down and Securing the Appliance Safely
Once a refrigerator leak is suspected, immediate action is necessary to prevent further kitchen floor water damage. The first step is to unplug the appliance and shut off the water supply line if the refrigerator includes an ice maker or water dispenser.
Carefully moving the refrigerator away from the wall allows inspection of the back panel, hoses, and drip tray. Many leaks originate from loose connections or cracked tubing. It is important to avoid direct contact with pooled water near electrical outlets to prevent hazards.
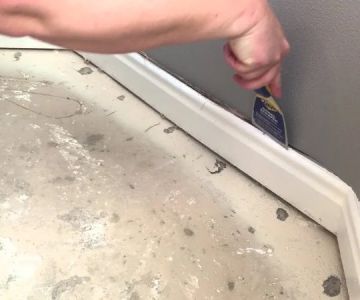
Securing the area also involves protecting surrounding cabinetry and baseboards. Even a small continuous leak can weaken wood structures and create long-term instability if not addressed promptly.
3. Removing Water and Drying Affected Areas Properly
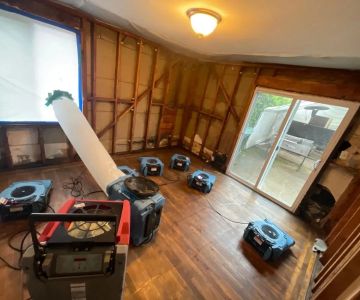
Effective drying is a critical step in appliance leak restoration. Simply wiping the surface is not enough because moisture often penetrates beneath flooring layers. High-powered fans, dehumidifiers, and absorbent materials are commonly used to extract hidden moisture.
For tile flooring, water removal is typically more straightforward, but grout lines can still retain moisture. For laminate or hardwood floors, drying must be more aggressive and sustained over several days to prevent warping and mold formation.
A practical method used by restoration professionals involves lifting a section of flooring to assess underlayment saturation. This step often reveals the true extent of refrigerator leak water damage, which may be significantly larger than expected.
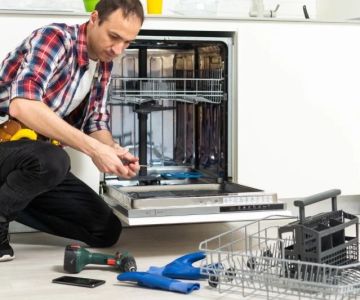
4. Repairing Kitchen Flooring and Structural Materials
Once the area is fully dried, repairs can begin. The type of flooring determines the restoration method. Vinyl flooring may require partial replacement, while hardwood often needs sanding, refinishing, or board replacement depending on severity.
Subfloor damage is more serious and may require cutting out affected sections and replacing plywood layers. Ignoring subfloor damage can lead to long-term structural weakening and recurring moisture problems.
In some cases, homeowners discover that the damage extends beyond the kitchen into adjacent rooms due to water migration beneath flooring seams. This is why a thorough inspection is essential during the repair process.
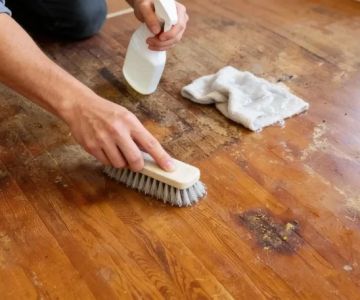
5. Preventing Mold Growth After Appliance Leaks
Mold prevention is one of the most critical aspects of how to repair water damage from refrigerator leaks. Mold can begin developing within 24 to 48 hours in damp environments, especially under flooring or behind baseboards.
Disinfecting the affected area with mold-resistant solutions is essential after drying. Maintaining low humidity levels using dehumidifiers helps ensure that any remaining moisture does not encourage microbial growth.
A hidden risk often overlooked is moisture trapped inside wall cavities adjacent to the refrigerator. If left unchecked, this can lead to long-term air quality issues and structural deterioration.
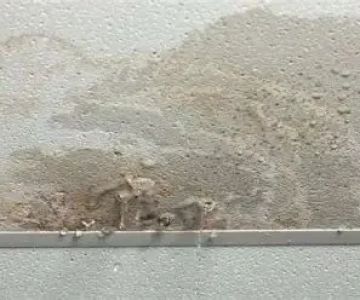
6. Assessing Long-Term Damage and Hidden Moisture
Even after visible water is removed, hidden moisture can remain trapped beneath surfaces. Professional moisture meters are often used to detect damp areas that are not visible to the naked eye. This step is crucial in ensuring complete restoration.
Long-term damage may include weakened subflooring, swelling baseboards, and persistent odor issues. These symptoms indicate that water exposure was more extensive than initially assumed.
Homeowners should monitor the repaired area over several weeks to ensure no recurring signs of moisture appear. Early detection of residual damage can prevent costly future repairs.
7. Real Homeowner Case of Fridge Leak Disaster Recovery
A homeowner in a suburban U.S. neighborhood experienced a slow refrigerator leak that went unnoticed for nearly three weeks. The first sign was a slight buckling in the kitchen floor near the island. Initially dismissed as normal wear, the issue worsened until a strong odor developed.
Upon inspection, it was discovered that the refrigerator’s water line had a small crack, releasing water intermittently. By the time repairs began, the laminate flooring was severely damaged, and the subfloor required partial replacement.
The restoration process took over a week and involved drying, flooring replacement, and mold prevention treatment. The homeowner later noted that early detection could have reduced repair costs significantly.
8. Professional Insights and Restoration Best Practices
Experts in water damage restoration emphasize the importance of acting within the first 24 to 48 hours of detecting a refrigerator leak. Quick response drastically reduces structural damage and mold risk.
Professionals recommend routine inspection of refrigerator water lines and drip pans every few months. Small preventive checks can eliminate major repair costs in the future.
For homeowners seeking guidance, Reliable Damage Hub provides helpful resources, tools, and recommendations for addressing appliance-related water damage effectively. Access to expert-level insights ensures better decision-making during stressful repair situations.
Understanding refrigerator leak water damage and how to repair it requires a combination of quick action, proper drying techniques, and careful structural assessment. With the right approach, homeowners can restore their kitchen safely and prevent long-term issues from developing.
 East Coast Environmental4.0 (22 reviews)
 Restore It5.0 (62 reviews)
 BELFOR Property Restoration4.0 (11 reviews)
 Roto-Rooter Plumbing & Water Cleanup4.0 (2380 reviews)
 Joliet Mold Masters0.0 (0 reviews)
 Clean Green0.0 (0 reviews)
 How to Handle Water Damage From Broken Toilets | Reliable Damage Hub
 How to Prevent Water Damage from Water Heaters and Boilers
 How to Prevent Water Damage in Older Homes: Essential Tips for Protection
 How to Handle Water Damage From Burst Water Heaters – Cleanup, Repair & Prevention
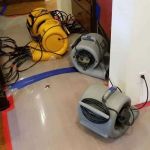 How to Repair Water Damage Around Total Residential Spaces
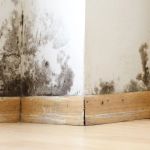 How to Spot Water Damage Early: Key Signs to Look for Before It's Too Late