
Window Leaks During Wind-Driven Rain: Contain Water and Trace the Entry
On this page
Quick answer
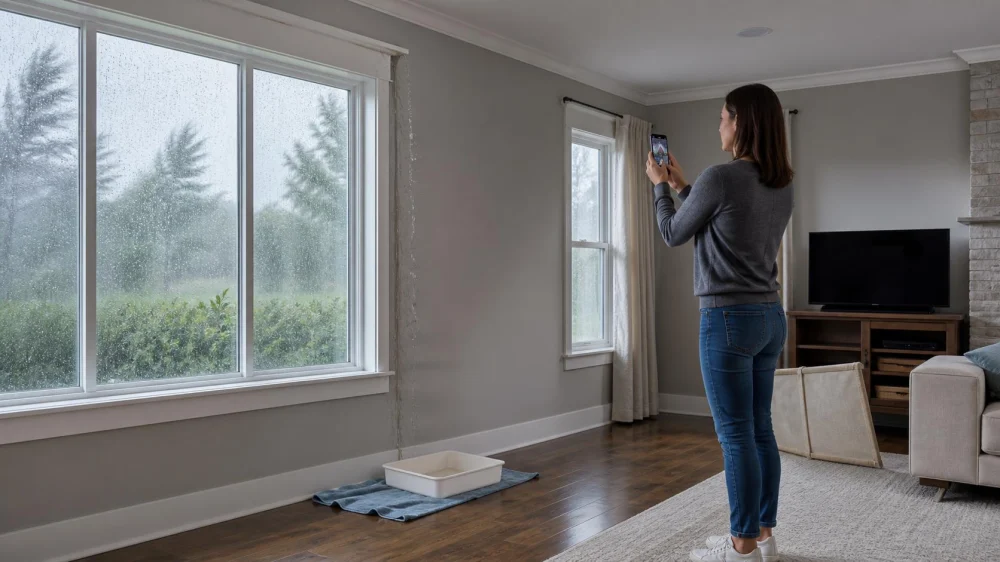
If water appears around a window during wind-driven rain, move people, electronics, curtains, and furniture away; contain dripping from a dry position; and keep clear of wet outlets, cords, or a sagging ceiling. Photograph where water first appears and the weather direction. Do not climb outside, open the wall, or apply sealant during the storm. After conditions are safe, arrange a building-envelope inspection and prompt drying.
The visible gap may not be the true entry point. Rain can enter at flashing, cladding joints, roof-to-wall details, fasteners, or drainage openings, then travel inside the assembly before showing at the window trim.

Drip Restoration / valleywide restoration mesa az
932 S Stapley Dr, Mesa, AZ 85204, USA
During the storm
- Keep occupants away from wet electrical devices, cracked glass, loose exterior materials, and ceilings that bulge or shed water.
- Move valuables to a dry room and place containers or absorbent material only where access is safe.
- Do not block intentional window drainage openings or weep paths.
- Do not lean out, use a ladder, or enter a roof, balcony, or exterior area in wind, rain, or lightning.
- Contact emergency services for downed power lines, fire, structural failure, or immediate danger; contact building management for shared walls or multi-unit façades.
If water is approaching an outlet or electrical equipment, do not touch the device or operate a nearby breaker from a wet area. A qualified electrician may need to assess the circuit.

Giants / dry kings restoration of san francisco
San FranciscoSan Francisco CountyCalifornia
685 Geary Blvd, San Francisco, CA 94102, USA
Document the pattern
Record the date, storm start, when moisture appeared, wind direction if known, rainfall intensity, and whether the window was closed and locked. Take a sequence of wide and close photographs showing the first wet location, staining, droplets, sill, trim, adjacent wall, ceiling, and floor. Mark the boundary of visible staining with removable tape and time-stamp changes without damaging finishes.
Note whether leaks occur only with wind from one direction, after prolonged rain, or immediately. Record recent window, roof, siding, painting, or sealant work. Check the room above, below, and beside the window from safe interior areas. Preserve contractor invoices and previous leak reports.
Investigate after weather clears
A qualified window or building-envelope contractor should inspect the complete water-management path: roof and wall transitions, cladding, flashing, head and sill details, perimeter joints, fasteners, drainage plane, window installation, and interior evidence. A restoration contractor can map moisture in drywall, insulation, sheathing, flooring, and trim.
Ask for a hypothesis tied to observations, not a tube of sealant as the diagnosis. Controlled water testing may help, but it should be planned to isolate areas in sequence and avoid creating damage. Document baseline conditions, test locations, water rate, duration, interior observations, and the point at which leakage begins.
Drying and repair
Stop the entry source and begin material-specific drying promptly. The EPA advises drying water-damaged materials within 24–48 hours to limit mold growth. Insulated cavities, layered flooring, absorbent trim, and paper-faced drywall may require selective access or removal; a dry-looking painted surface is not a moisture measurement.
The repair should restore the intended drainage and flashing sequence, not simply trap water inside with surface caulk. Request drawings or photos of concealed work, compatible material specifications, permits where required, and a post-repair verification test. Keep drying logs and final moisture readings separate from the exterior repair warranty.
Checklist
- Occupants and valuables moved from hazards
- Leak contained from a dry interior position
- Wet electrical and sagging-ceiling zones isolated
- Weather direction and leak timing recorded
- First wet point and spread photographed
- Adjacent rooms and levels checked safely
- Envelope and moisture investigations coordinated
- Repair detail, verification test, and dry standard documented
Limitations
Interior observations cannot identify the exterior defect with certainty. Water paths change with wind, pressure, construction, and storm duration. Testing and exterior access can create hazards or additional leakage and should be handled by qualified people. Contaminated water, major structural damage, or extensive mold requires a broader professional response.
FAQ
Should I caulk the inside edge?
Not as a first diagnosis. Interior caulk may hide the symptom or redirect water while the exterior defect remains.
Why does it leak only in some storms?
Wind direction, pressure, rainfall duration, and water volume can expose a detail that stays dry in calm rain.
Can I drill a hole to drain the wall?
Do not drill without locating wiring, plumbing, structure, and the planned drying path. Get qualified guidance.
Is staining proof of active mold?
No. Staining shows a moisture history; moisture mapping and inspection determine current conditions, while mold conclusions require appropriate assessment.
Who should I call?
Use a building-envelope or qualified window contractor for entry-path diagnosis, restoration expertise for wet materials, and an electrician for affected electrical systems.
Evidence notes
The EPA’s moisture-control guidance says to act quickly after leaks, fix the source, and dry damp materials within 24–48 hours. It also notes that condensation or moisture on windows and walls should be addressed promptly. The actual repair must follow the window manufacturer, building design, applicable code, and a site-specific investigation.
Conclusion
A rain leak at a window is a clue, not a complete diagnosis. Stay inside and safe during the storm, capture the timing and path, inspect the whole exterior water-management assembly, dry concealed materials, and verify the repair under controlled conditions.
 PuroClean of Nanuet5.0 (111 reviews)
 Aspen Restorations, LLC4.0 (13 reviews)
 Dry Masters Water Damage Restoration Service5.0 (12 reviews)
 Verg Restoration4.0 (65 reviews)
 Lost River Building Group5.0 (3 reviews)
 Mr. Handyman of Midwest Collin County4.0 (1273 reviews)
 Water Damage Restoration for Hospitals and Healthcare Facilities: Essential Guide
 How to Handle Water Damage From HVAC Systems: Repair and Prevention Guide
 Water Damage Restoration Closeout: Records, Repairs, and Warranty
 Water Damage Restoration for Office Buildings: Essential Steps and Prevention Tips
 Never Attempt DIY Water Damage Repair in a Flooded Home – The Risks & Benefits of Professional Help
 How to Deal with Water Damage in Your Home’s Subflooring: Step-by-Step Guide