

Water Damage Repair for Ceiling Tiles: How to Fix and Restore
- Understanding Water Damage on Ceiling Tiles
- Common Causes of Water Damage to Ceiling Tiles
- Steps to Repair Water-Damaged Ceiling Tiles
- Replacement vs. Restoration of Ceiling Tiles
- Preventing Future Water Damage to Ceiling Tiles
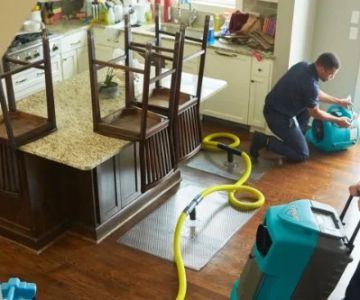
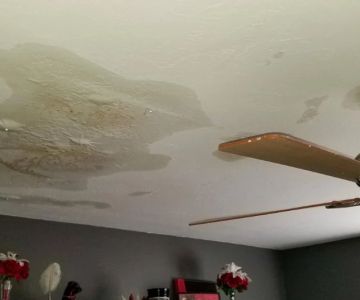
Water damage to ceiling tiles is a common issue faced by many homeowners and businesses alike. Over time, ceilings can become discolored, stained, or even begin to sag due to water infiltration from leaky roofs, plumbing issues, or other sources of moisture. Whether you have one damaged tile or several, addressing the problem early is crucial to prevent further damage to the structure and the potential for mold growth. In this article, we will walk you through the causes of water damage, the repair process, and how to restore your ceiling tiles to their original condition.
Water damage to ceiling tiles can result from a variety of sources. Some of the most common causes include:
- Roof Leaks: Damaged or aging roofing can allow water to seep through, causing stains or sagging tiles in the ceiling below.
- Plumbing Leaks: Leaky pipes, especially those running through the ceiling or walls, can contribute to water damage if undetected.
- Condensation: Inadequate ventilation can lead to moisture buildup in attics or ceiling spaces, which in turn causes water damage to tiles.
- Storm Damage: Heavy rain or storms can exacerbate water infiltration, leading to more severe ceiling tile damage.
If you notice water damage on your ceiling tiles, here are the basic steps to repair them:
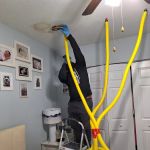
1. Identify the Source of Water
Before attempting to fix the ceiling tiles, it’s important to first identify and address the source of the water damage. If the leak is due to plumbing or a roof issue, repairs should be made immediately to prevent further water infiltration.2. Remove Damaged Tiles
Once the source of the water has been repaired, you can begin the process of repairing the ceiling. Carefully remove the damaged ceiling tiles. Depending on the type of tile, this may involve unscrewing or prying them loose. Dispose of the damaged tiles properly.3. Clean the Area
After removing the damaged tiles, inspect the area for any residual water or mold. Use a clean, dry cloth to wipe down the area and ensure it is completely dry. If you find mold or mildew, clean the affected area using a mold-killing solution or consult a professional for mold remediation.4. Replace or Restore the Tiles
If the water damage is limited to a few tiles, you may be able to replace them with new ones that match the rest of your ceiling. If the tiles are still structurally sound but need restoration, you can clean and repaint them. Applying a fresh coat of paint can help restore their appearance and prevent further staining.5. Install New Tiles
After the area has been thoroughly cleaned and dried, install new or restored ceiling tiles. Ensure the tiles fit securely and are properly aligned with the rest of the ceiling. Use a ceiling tile adhesive or installation clips as necessary for a secure hold.When deciding between replacing or restoring your water-damaged ceiling tiles, consider the extent of the damage. If the tiles are structurally compromised, such as with large cracks or holes, replacing them is often the best option. However, if the damage is cosmetic—such as stains or slight warping—restoring the tiles can be a more cost-effective solution. For smaller areas or minor damage, cleaning, repainting, or sealing the tiles can give them a new life and save on the cost of replacement.
To prevent future water damage to your ceiling tiles, here are a few helpful tips:
- Inspect your roof: Regularly check for signs of wear and tear or leaks that may cause water to seep through your ceiling.
- Improve ventilation: Ensure proper ventilation in areas like attics and bathrooms to reduce humidity and prevent moisture buildup.
- Fix plumbing issues promptly: Leaking pipes can cause hidden damage over time, so it’s important to repair plumbing issues quickly.
- Install water barriers: Consider installing water barriers or shields in areas prone to water damage, such as below pipes or along rooflines.

Kustom US Restoration / kustom restoration
1215 W Houston Ave Suite A, Gilbert, AZ 85233, USA
Conclusion: Repairing Water-Damaged Ceiling Tiles
Water damage to ceiling tiles is a common issue, but with the right tools and knowledge, it’s possible to restore them to their original condition. Whether you’re replacing damaged tiles or restoring them through cleaning and repainting, addressing the issue promptly can help prevent further damage. Regular inspections and preventive measures will ensure your ceiling remains in good condition for years to come. If you need assistance with repair products or professional services, visit Reliable Damage Hub for trusted solutions to your ceiling tile repair needs.


 SafeOwner: Safe Owner5.0 (63 reviews)
 Water Damage Services Texas5.0 (6 reviews)
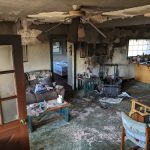 SERVPRO of Calvert County5.0 (40 reviews)
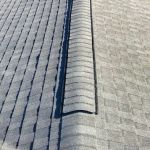 Absolute Assurance Restorations LLC4.0 (194 reviews)
 Water Removal Queens5.0 (24 reviews)
 Reliable Design-Build-Remodel4.0 (49 reviews)
 How to Handle Water Damage From Laundry Rooms | Reliable Damage Hub
 The Hidden Dangers of Water Damage and How to Avoid Them
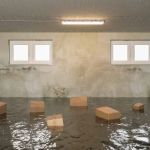 How to Repair Water-Damaged Window Frames: A Step-by-Step Guide
 How to Safely Remove Water From Hardwood Floors: Expert Tips
 Top Tools Every Homeowner Should Have for Water Damage Repair
 Water Damage Repair for Hardwood and Laminate Floors: A Complete Guide