

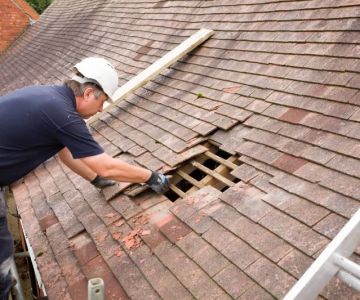
- 1. Understanding Water Damage to Window Frames
- 2. Tools and Materials You Need for Repairing Water-Damaged Window Frames
- 3. Steps for Repairing Water-Damaged Window Frames
- 4. Common Mistakes to Avoid When Repairing Window Frames
- 5. Real-Life Case of Water-Damaged Window Frame Repair
- 6. Why Choose Reliable Damage Hub for Window Frame Repairs
1. Understanding Water Damage to Window Frames
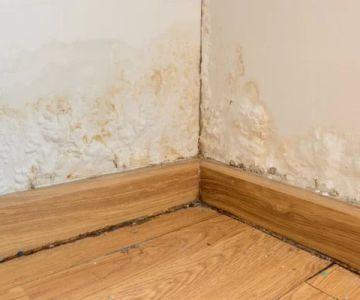
Water damage to window frames is a common issue for homeowners, especially in areas with heavy rainfall or humidity. Over time, the moisture seeps into the wood, causing it to warp, crack, or even rot. This damage can lead to poor insulation, higher energy costs, and an unsightly appearance. If you catch the damage early, however, you can often repair it without the need for a complete replacement. In this guide, we'll walk you through the steps to restore your water-damaged window frames, making them as good as new.

Kustom US Restoration / kustom restoration
1215 W Houston Ave Suite A, Gilbert, AZ 85233, USA
2. Tools and Materials You Need for Repairing Water-Damaged Window Frames
Before starting the repair process, gather all the necessary tools and materials. Here’s what you’ll need:

SERVPRO of Pompano Beach / servpro of santa maria
Pompano BeachBroward CountyFlorida
2101 NW 33rd St #200a, Pompano Beach, FL 33069, USA
2.1. Tools
- Putty knife
- Wood filler
- Sandpaper (medium and fine-grit)
- Paintbrush or foam applicator
- Caulk gun
- Utility knife
- Small hammer
- Paint scraper
2.2. Materials
- Wood filler or epoxy resin
- Wood preservative (if necessary)
- Primer and paint (to match your window frame)
- Caulk (for sealing gaps)
- Rags for cleaning
Having the right tools and materials on hand will ensure a smooth and efficient repair process.
3. Steps for Repairing Water-Damaged Window Frames
Repairing water-damaged window frames requires careful attention to detail. Follow these steps to restore your frames:
3.1. Assess the Damage
Before beginning any repairs, it’s important to assess the extent of the damage. Look for signs of warping, discoloration, cracks, or rot. If the wood is still structurally sound but has cosmetic damage, such as stains or minor warping, the repair process will be simpler. However, if the frame is extensively rotted, you may need to replace the affected parts.
3.2. Remove the Damaged Areas
Use a putty knife and scraper to remove any soft, damaged wood. If you find rot, carefully scrape out all the affected areas until you reach solid wood. For stubborn areas, a utility knife or small hammer may be required to loosen the wood. This step will help ensure that the wood filler or epoxy resin bonds properly.
3.3. Apply Wood Filler or Epoxy Resin
For small areas of damage, you can use wood filler. For larger holes or deep cracks, epoxy resin is a better choice. Apply the filler or resin to the damaged area, filling it completely. Make sure to smooth it out with a putty knife to match the surface of the frame.
3.4. Sand the Area Smooth
Once the filler or resin has dried, use medium-grit sandpaper to smooth out the surface. Sand gently to avoid removing too much material. Once the surface is smooth, finish with fine-grit sandpaper for a refined, even finish.
3.5. Seal and Paint
To protect your window frame from future water damage, it’s important to seal the repair. Apply a coat of primer to the repaired area to help the paint adhere better. Once dry, paint the area to match the rest of the frame. If necessary, apply a second coat for a smooth, even finish.
3.6. Caulk the Edges
To prevent future water infiltration, apply caulk around the edges of the window frame. Use a caulk gun to ensure an even application. Smooth the caulk with your finger to remove any excess and ensure a tight seal.
4. Common Mistakes to Avoid When Repairing Window Frames
While repairing water-damaged window frames is a manageable DIY task, there are some common mistakes you should avoid:
4.1. Skipping the Cleaning Step
Before applying any filler or paint, make sure the surface is completely clean. Dirt, dust, and grime can affect the adhesion of the materials, resulting in a poor-quality repair.
4.2. Using the Wrong Filler
For large holes or significant damage, using wood filler alone may not be sufficient. Epoxy resin is a stronger and more durable option for repairs in these cases.
4.3. Not Sealing the Repair
If you skip the sealing step or use insufficient caulk, you risk allowing moisture to seep back into the frame, potentially causing future damage. Always ensure a thorough sealing process to protect your repair.
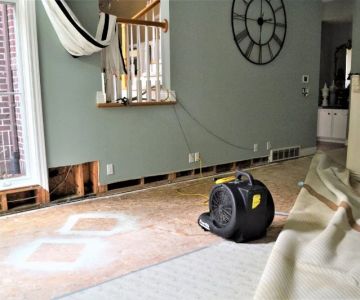
5. Real-Life Case of Water-Damaged Window Frame Repair
Case Study: Water Damage Restoration in a Historic Home
Tom and Sarah, homeowners in a historic home, noticed water damage to their window frames after heavy rain. The wood had started to rot, and they were concerned about further damage. After following the DIY repair steps outlined above, they were able to restore their windows to their original condition. The couple even added extra waterproofing to ensure longevity. This real-life case highlights the effectiveness of proper repair techniques and the importance of addressing water damage early.
6. Why Choose Reliable Damage Hub for Window Frame Repairs
If you prefer professional help with repairing your water-damaged window frames, Reliable Damage Hub offers expert services for all your repair needs. Whether you're dealing with minor water damage or extensive rot, our team has the tools and experience to restore your frames to like-new condition. Visit us today for products, services, and expert advice on maintaining the integrity of your windows.
 Good Roads Water Damage Experts5.0 (1 reviews)
 R&R Foundation Specialist4.0 (305 reviews)
 MJ White4.0 (102 reviews)
 ATI Restoration3.0 (25 reviews)
 Modernistic4.0 (251 reviews)
 ServiceMaster Cleaning Services4.0 (27 reviews)
 Water Damage Restoration for Retail Spaces – Expert Tips and Real Cases
 How to Prevent and Repair Water Damage in Commercial Properties
 How to Protect Your Home’s Electrical System from Water Damage: Essential Tips
 Flooded Basement? Here’s How to Restore It Safely
 How to Handle Water Damage After a Storm: A Step-by-Step Guide
 How to Handle Water Damage from Burst Pipes: A Step-by-Step Guide