
- 1. Understanding Water Damage from Leaky Appliances
- 2. The First Steps to Take When You Detect a Leak
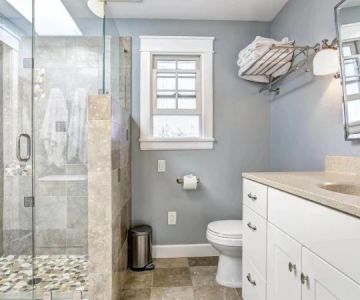
- 3. How to Assess the Extent of Water Damage
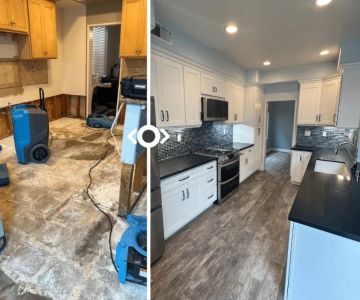
- 4. Repairing Water Damage Caused by Leaky Appliances
- 5. Preventing Future Water Damage from Leaky Appliances
1. Understanding Water Damage from Leaky Appliances
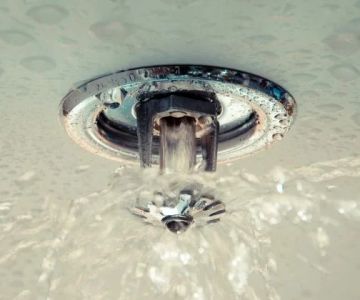
Water damage from leaky appliances can cause significant harm to your home if not addressed quickly. Appliances such as dishwashers, washing machines, and refrigerators with ice makers are common culprits. Even small leaks can lead to large amounts of water damage, affecting walls, floors, and ceilings. It's essential to understand how these leaks occur and why timely action is critical for avoiding long-term structural damage.

SERVPRO of Pompano Beach / servpro of santa maria
Pompano BeachBroward CountyFlorida
2101 NW 33rd St #200a, Pompano Beach, FL 33069, USA
2. The First Steps to Take When You Detect a Leak
Upon discovering a water leak from an appliance, it's important to act fast to minimize the damage. Here’s what you should do:

Kustom US Restoration / kustom restoration
1215 W Houston Ave Suite A, Gilbert, AZ 85233, USA
2.1 Turn Off the Water Supply
First, turn off the water supply to the appliance to stop the leak. Many appliances have a dedicated water shut-off valve that can be turned off immediately. If you can't locate it, turn off the main water supply to the house to prevent further leakage.
2.2 Remove Excess Water
Use towels, a mop, or a wet/dry vacuum to remove excess water from the affected area. The quicker you remove the water, the less time it will have to seep into surrounding materials, such as wood or drywall, and cause further damage.
2.3 Inspect the Source of the Leak
Determine where the water is coming from. Check hoses, connections, or seals to pinpoint the problem. If the leak is inside an appliance, turn off the power to avoid electrical hazards and carefully inspect the appliance for obvious signs of failure.
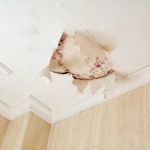
3. How to Assess the Extent of Water Damage
Once you’ve stopped the leak, the next step is to assess the extent of the water damage. Water can quickly spread beneath surfaces, so it's essential to check not only visible areas but also hidden spots that may be affected.
3.1 Check for Dampness in Walls and Floors
Water damage often affects walls and floors, especially in rooms with appliances like dishwashers or washing machines. Use a moisture meter to check the dampness behind walls or underneath floors. This will give you a better idea of how far the water has spread and whether there is mold or mildew growth.
3.2 Inspect for Mold and Mildew
If water has been present for an extended period, mold and mildew can begin to grow. Look for any visible signs of mold, such as black or green spots, or musty odors. These can be indicators of more severe water damage and should be addressed immediately to avoid health risks.
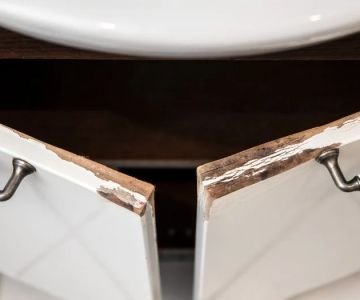
3.3 Evaluate the Condition of Affected Materials
Some materials, like drywall and insulation, may need to be replaced if they are severely soaked. Wood floors and furniture may swell, warp, or rot if exposed to water for too long. Take note of the damage to decide if professional repair or replacement is necessary.
4. Repairing Water Damage Caused by Leaky Appliances
After assessing the damage, the next step is repairing the affected areas. Here are the general steps you can follow:
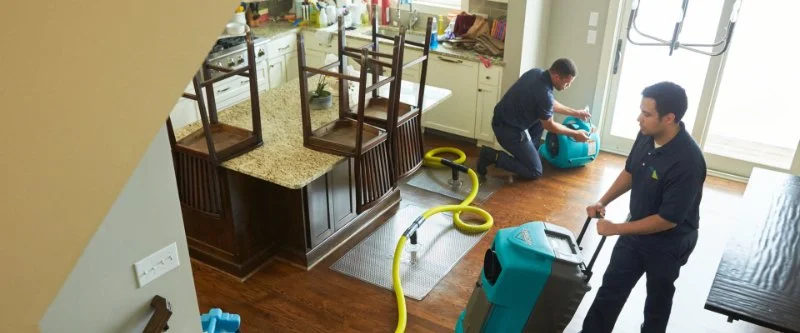
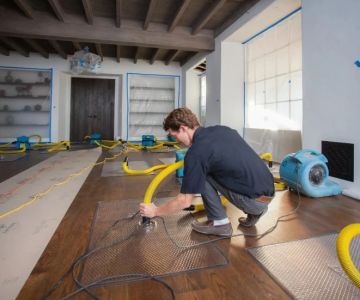
4.1 Drying and Dehumidifying the Area
Before you can begin repairing, you must thoroughly dry the area to prevent mold growth. Use fans, dehumidifiers, or hire a professional drying service to ensure the space is completely dry.
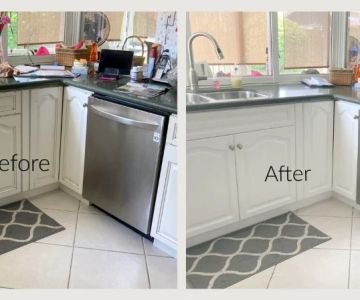
4.2 Replace Damaged Materials
If drywall, flooring, or insulation has been damaged by water, they may need to be replaced. Cutting out wet drywall and replacing it with new material is essential to prevent mold and structural issues. Similarly, affected flooring may need to be pulled up and replaced to prevent long-term damage.
4.3 Seal and Insulate
Once the area is dry, re-seal any gaps in the plumbing, appliance connections, or surrounding surfaces. Insulate any areas that were impacted by the water to avoid heat loss or further moisture intrusion in the future.
5. Preventing Future Water Damage from Leaky Appliances
Once you've addressed the current water damage, it’s essential to take steps to prevent future leaks. Here are some tips to help maintain your appliances and keep your home dry:
5.1 Regularly Inspect Appliances
Routine maintenance and inspection of appliances, especially those that use water, can help identify potential issues before they lead to leaks. Check hoses, seals, and connections regularly to ensure they are secure and in good condition.
5.2 Install Leak Detection Systems
Consider installing water leak detection systems or alarms near major appliances, such as dishwashers and refrigerators. These systems will alert you if a leak is detected, allowing you to act quickly before significant damage occurs.
5.3 Use Water-Proofing Measures
In areas prone to leaks, use waterproofing measures such as water barriers, water-resistant floor coatings, and splash guards around appliances. These can help prevent water from reaching areas where it could cause damage.
By following these steps, you can address the damage caused by leaking appliances and take proactive measures to protect your home from future leaks.
If you're looking for the best tools and services to handle water damage repairs, visit Reliable Damage Hub for expert advice and high-quality products.
 Predator restoration5.0 (83 reviews)
 ATI Restoration4.0 (242 reviews)
 Fire Industry Restoration Experts4.0 (84 reviews)
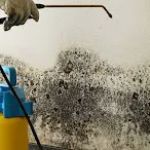 Mold Remediation Fort Lauderdale5.0 (59 reviews)
 Anvil Remediation & Restoration5.0 (182 reviews)
 A Cape Fear Water Damage0.0 (0 reviews)
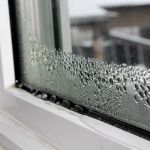 How to Handle Water Damage From Leaky Windows
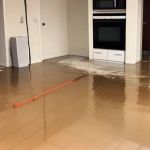 Water Damage Restoration for Apartments and Condos: Expert Solutions
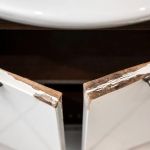 How to Repair Water-Damaged Cabinets and Countertops
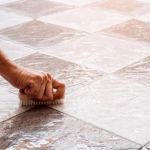 Water Damage Repair for Tile and Grout: Comprehensive Guide to Restoration
 Water Damage Restoration for Multi-Family Homes: A Comprehensive Guide
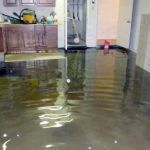 What to Do if Your House is Flooded from a Broken Pipe | Reliable Damage Hub