

- water-damage-assessment - How to evaluate attic flooring damage after leaks or moisture exposure
- safety-first-approach - Structural risks and safety precautions before starting repairs
- removing-damaged-materials - Identifying and removing compromised flooring sections
- drying-and-moisture-control - Preventing mold and long-term structural issues
- subfloor-repair-techniques - How to restore or replace damaged wood structures
- reinforcement-methods - Strengthening attic flooring for long-term durability
- real-case-example - A homeowner attic restoration story after roof leakage
- tools-and-materials-needed - Essential equipment for proper restoration work
- professional-vs-diy - When to call experts vs doing it yourself
- long-term-prevention - Preventing future attic water damage issues
1. Understanding Water Damage in Attic Flooring and How It Starts
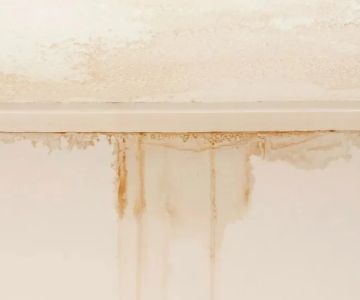
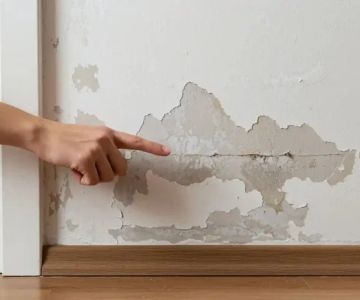
When dealing with how to restore water-damaged attic flooring, the first step is understanding how the damage actually happens. Most attic flooring issues begin with unnoticed roof leaks, condensation buildup, or plumbing failures that slowly seep into wooden structures over time.
In many homes, the attic is not inspected regularly, which allows moisture to accumulate quietly. By the time visible stains or soft spots appear, the subfloor may already be compromised.

SERVPRO of Pompano Beach / servpro of santa maria
Pompano BeachBroward CountyFlorida
2101 NW 33rd St #200a, Pompano Beach, FL 33069, USA
Common Causes of Attic Floor Water Damage
Water damage rarely happens overnight. Instead, it develops gradually due to structural vulnerabilities:
- Roof shingle leaks during storms
- Poor attic ventilation trapping humidity
- Ice dams forming in colder climates
- Broken or leaking plumbing lines in upper floors
Understanding the root cause is essential before any restoration begins, because repairing the floor without fixing the source will only lead to repeated damage.
2. Safety Risks Before Starting Any Restoration Work
Before stepping into repairs, safety must be the priority. Water-damaged attic flooring can weaken structural integrity, making it unsafe to walk on certain areas.
Structural Weak Points to Watch
Damaged joists or subfloor panels may look intact but can collapse under weight. This is especially true in older homes where wood has already undergone years of wear.
In severe cases, mold growth can also pose respiratory risks, requiring protective gear before entry.
Professionals from services like Reliable Damage Hub often begin with a full structural inspection before any physical repair work starts, ensuring no hidden hazards are overlooked.
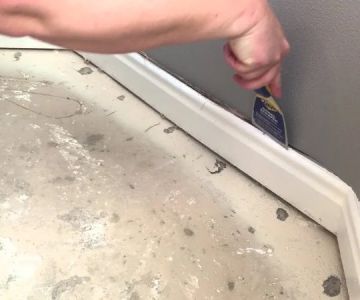
3. Removing Water-Damaged Flooring Materials Properly
The next step in restoring attic flooring is identifying which sections are beyond repair. Not all wet wood needs replacement, but anything soft, warped, or mold-infested should be removed immediately.
Step-by-Step Removal Process
- Mark all visibly damaged sections using chalk or tape
- Carefully cut out affected plywood or boards
- Avoid disturbing surrounding stable joists
- Dispose of contaminated material safely
This process ensures that only compromised areas are removed, reducing unnecessary reconstruction costs.
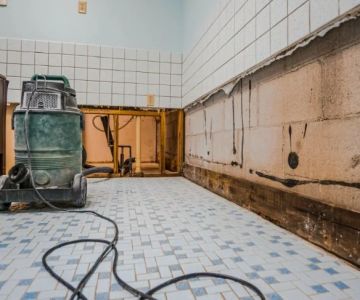
4. Drying and Moisture Control Before Repair Work
One of the most overlooked steps in attic flooring restoration is proper drying. Even after damaged materials are removed, moisture can remain trapped in wood fibers and insulation.
Effective Drying Techniques
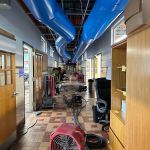
High-powered fans, dehumidifiers, and ventilation are essential tools in this stage. The goal is to bring moisture levels in structural wood back to safe limits before reconstruction begins.
Skipping this step often leads to mold regrowth, which can spread quickly throughout attic spaces.
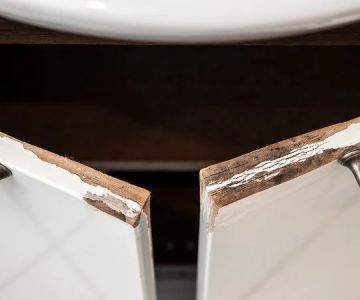
5. Repairing or Replacing the Attic Subfloor
Once the area is dry, repairs can begin. Depending on the extent of damage, homeowners may either reinforce existing boards or replace entire sections.
Partial Repair Approach
If only minor sections are affected, contractors may install new plywood patches and secure them to existing joists using structural screws.
Full Replacement Approach
In severe cases, entire subfloor sections must be rebuilt to restore structural integrity. This ensures the attic can safely support weight again.
This is where professional insight becomes valuable. Companies like Reliable Damage Hub often evaluate whether reinforcement or full replacement provides better long-term stability.
6. Strengthening Attic Floors for Long-Term Durability
After repairs, reinforcement ensures that the attic flooring can withstand future stress and potential moisture exposure.
Common Reinforcement Techniques
- Adding sister joists alongside weakened beams
- Installing moisture-resistant plywood panels
- Applying protective sealants to wood surfaces
These methods significantly increase structural longevity and reduce the risk of recurring damage.
7. Real Homeowner Story: Unexpected Attic Leak Recovery
One homeowner in the Midwest discovered attic water damage only after noticing a faint musty smell in the upstairs hallway. Upon inspection, a slow roof leak had saturated a section of attic flooring over several months.
By the time restoration began, part of the subfloor had softened significantly. After removing damaged boards and fully drying the structure, professionals rebuilt the affected area using reinforced plywood and sealed joists.
Within weeks, the attic was fully restored, and the homeowner reported improved insulation performance and no further moisture issues during heavy rainfall seasons.
8. Essential Tools and Materials for Attic Floor Restoration
Successful restoration requires proper equipment to ensure precision and safety.
Common Tools Used
- Moisture meter for detecting hidden dampness
- Circular saw for cutting damaged sections
- Industrial fans and dehumidifiers
- Protective gloves and respirators
Using the right tools helps prevent mistakes that could compromise structural stability.
9. Should You Repair It Yourself or Hire Professionals?
While minor attic repairs may be manageable for experienced DIY homeowners, structural water damage is often best handled by professionals.
The key difference lies in diagnosis accuracy. Experts can identify hidden damage that is not visible on the surface, preventing future failures.
For comprehensive restoration services, Reliable Damage Hub provides assessments and repair solutions tailored to different levels of attic water damage severity.
10. Preventing Future Attic Water Damage Issues
Once repairs are complete, prevention becomes the most important focus. Regular roof inspections, proper ventilation, and moisture monitoring can significantly reduce future risks.
Small preventive steps, such as sealing roof gaps and checking insulation annually, can make a major difference in protecting attic flooring long-term.
Understanding how to restore water-damaged attic flooring is not just about fixing current problems but also about preventing future ones. With the right approach and expert support from Reliable Damage Hub, homeowners can ensure their attic remains structurally sound for years to come.

 RDC Restoration5.0 (5 reviews)
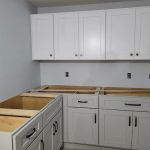 Potomac Valley Building Restoration3.0 (17 reviews)
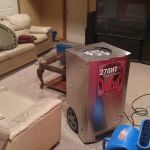 DBH LLC Services0.0 (0 reviews)
 All Dry Services of Orlando5.0 (39 reviews)
 Znd-IO Mold Removal & Mold Remediation Service Florida City, FL4.0 (24 reviews)
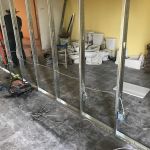 Tucson Restoration Solutions3.0 (6 reviews)
 Restoring Water-Damaged Electronics: What Works and What Doesn’t
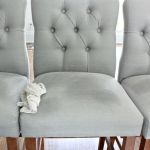 How to Clean and Dry Water-Damaged Upholstered Furniture
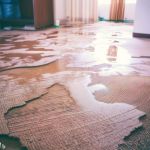 Water Damage Repair for Subflooring Under Carpets
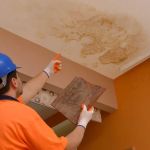 The Top 5 Signs of Water Damage You Shouldn't Ignore | Protect Your Home
 Water Damage Repair for Basement Flooring
 What You Need to Know About Water Damage and Your Home Insurance: A Complete Guide