

- Understanding Bathroom Water Damage - Common Causes and Risks
- Identifying Water Damage Around Bathroom Fixtures Early
- Assessing Structural and Cosmetic Impact of Leaks
- Essential Tools and Materials for Bathroom Water Repairs
- Step-by-Step Guide to Fixing Sink and Vanity Leaks
- Repairing Toilet Leaks and Base Water Damage
- Addressing Bathtub and Shower Water Damage Effectively
- Mold Prevention and Moisture Control Strategies
- Case Study - A Bathroom Renovation Saved from Hidden Water Damage
- Professional Support and How Reliable Damage Hub Can Help
Understanding Bathroom Water Damage - Common Causes and Risks
Water damage around bathroom fixtures is one of the most frequent yet overlooked issues in American homes. It can originate from simple leaks or persistent moisture buildup over time. Learning How to Fix Water Damage Around Bathroom Fixtures starts with understanding the root causes. Most commonly, leaks originate from loose seals, worn-out caulking, or faulty plumbing connections under sinks, around toilets, and in showers or bathtubs.
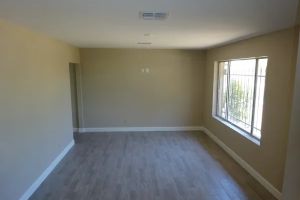
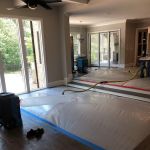
A small drip may seem harmless at first, but over time it can cause significant structural issues, including warped flooring, compromised wall studs, and subfloor deterioration. Bathroom water damage is particularly insidious because it often goes unnoticed behind cabinets or under tiles, giving mold and rot ample time to develop.
Environmental factors such as high humidity and poor ventilation exacerbate the problem. Even minor fixture leaks can accelerate moisture accumulation, leading to visible stains, peeling paint, or a musty odor. Early awareness is essential to prevent escalating costs and maintain the integrity of the home.
Kustom US Restoration / kustom restoration
1215 W Houston Ave Suite A, Gilbert, AZ 85233, USA
Identifying Water Damage Around Bathroom Fixtures Early
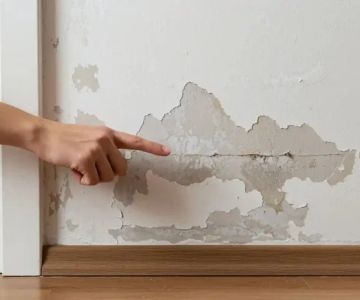
Early detection is crucial. Common indicators include discoloration of flooring or baseboards, sagging or soft tiles, and persistent dampness around fixtures. Paying attention to subtle signs like water pooling under the sink or around the toilet base can save thousands of dollars in repairs.
Additionally, musty odors or visible mold growth behind cabinets or under vanities are signs that water has infiltrated hidden spaces. Bathroom ventilation systems play a pivotal role in limiting moisture accumulation, so checking exhaust fans and airflow patterns can help prevent future issues.
In many cases, homeowners misinterpret the source of damage. For example, water staining on the ceiling below a bathroom often originates from a slow leak at the tub or shower above. Tracing the exact source is key to effective repair.

SERVPRO of Pompano Beach / servpro fort lauderdale south
Pompano BeachBroward CountyFlorida
2101 NW 33rd St #200a, Pompano Beach, FL 33069, USA
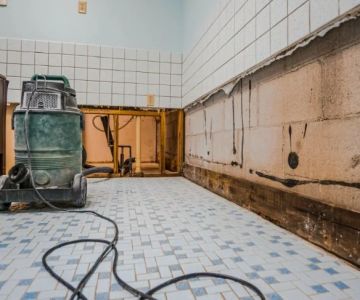
Assessing Structural and Cosmetic Impact of Leaks
Once water damage is identified, evaluating both structural and cosmetic impact is essential. Structural damage may include weakened subflooring, warping of studs, or compromised drywall. Cosmetic damage can involve staining, peeling paint, or warped trim.
Prioritizing repair depends on severity. Minor surface staining may only require cosmetic touch-ups and re-caulking, whereas compromised subfloors necessitate full replacement. Ignoring structural issues can lead to extensive mold growth, further weakening the area and posing health risks.
Understanding the depth of damage allows homeowners to develop a repair plan that balances cost, effort, and long-term effectiveness. It also informs decisions on whether professional intervention is needed.
Essential Tools and Materials for Bathroom Water Repairs
Repairing water damage effectively requires a set of tools and materials that ensure durability and safety. Common items include high-quality silicone or acrylic caulking, adjustable wrenches, pipe sealant, replacement washers, moisture meters, and protective gloves.
In addition, materials such as mildew-resistant drywall, waterproof membrane sheets, and specialized underlayment can provide long-term protection against recurring leaks. Using substandard products often results in recurring problems, so investing in quality supplies is critical.
Moisture meters are particularly useful for detecting hidden dampness behind walls or under flooring. They allow homeowners to assess the extent of water penetration before initiating repairs, ensuring that all affected areas are addressed.
Step-by-Step Guide to Fixing Sink and Vanity Leaks
Sink and vanity leaks often result from loose supply lines, worn washers, or degraded seals. To fix these issues:
1. Turn off the water supply to the affected fixture.
2. Remove the cabinet doors or panels for full access.
3. Inspect supply lines and connections for wear or corrosion.
4. Tighten or replace washers, gaskets, and hoses as needed.
5. Apply fresh silicone caulking around the sink basin edges to seal gaps.
6. Test for leaks by turning on the water slowly and monitoring for drips.
7. Allow caulking to cure completely before closing cabinets or using the sink extensively.
Regular maintenance of these components prevents recurring leaks and protects underlying cabinetry from water damage. Reliable Damage Hub offers products and detailed guidance to assist homeowners in these repair tasks.
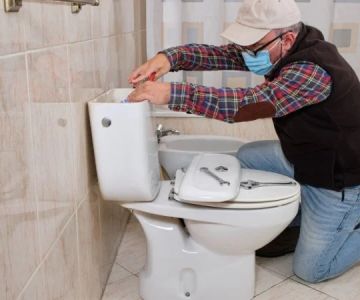
Repairing Toilet Leaks and Base Water Damage
Toilet leaks commonly occur at the base, around the wax ring, or from faulty supply valves. Addressing these leaks involves:
1. Shutting off water supply to the toilet.
2. Draining the tank and bowl completely.
3. Removing the toilet to inspect the wax ring or rubber gasket.
4. Replacing the wax ring and re-seating the toilet.
5. Tightening bolts evenly to avoid cracking the base.
6. Testing for leaks by refilling the tank and checking the base thoroughly.
Base leaks can damage subflooring, so addressing them promptly is critical. In some cases, water-damaged subfloor must be replaced before reinstalling the toilet. This ensures structural stability and prevents mold growth.
Addressing Bathtub and Shower Water Damage Effectively
Water damage around bathtubs and showers often results from failing caulking, cracked tiles, or loose grout. Repair steps include:
1. Removing old caulking and cleaning surfaces thoroughly.
2. Inspecting surrounding tiles for cracks or loose adhesive.
3. Applying mildew-resistant caulking along joints.
4. Re-grouting tiles where necessary to restore a watertight seal.
5. Ensuring proper slope toward drains to prevent pooling.
For larger damage, such as rotted subfloor or wall studs, professional repair is often required. Timely intervention prevents the spread of mold and protects the bathroom’s overall integrity.
Mold Prevention and Moisture Control Strategies
Even after repairs, ongoing moisture control is crucial. Effective strategies include running exhaust fans during and after showers, using moisture-absorbing materials, and regularly inspecting caulking and seals for wear.
In high-humidity regions, installing a dehumidifier can prevent mold growth. Mold-resistant paints and wall panels also provide additional protection for vulnerable areas.
Preventive maintenance reduces recurring water damage and ensures that bathroom fixtures remain safe and functional for years.
Case Study - A Bathroom Renovation Saved from Hidden Water Damage
A homeowner discovered persistent musty odors and minor floor warping under a recently remodeled bathroom vanity. Initially assumed cosmetic, a thorough inspection revealed a slow leak from the sink’s supply line, which had been improperly sealed during installation.
By replacing seals, reinforcing the subfloor, and applying mildew-resistant caulking around all fixtures, the homeowner avoided extensive mold remediation costs. This case illustrates the importance of early detection, proper repair techniques, and using quality materials to prevent recurring damage.
Professional Support and How Reliable Damage Hub Can Help
Fixing water damage around bathroom fixtures can be complex, especially when hidden structural issues or mold are involved. Professional evaluation ensures that all damage is identified and repaired correctly.
Reliable Damage Hub offers homeowners access to expert guidance, recommended materials, and vetted services. From instructional repair guides to locating professional contractors, the platform helps reduce uncertainty, saving time, money, and long-term home integrity.
Addressing water damage early with proper repair methods protects the home, prevents health hazards, and maintains property value—making expert advice and high-quality materials an essential part of every bathroom repair project.


 NEKO - Water Damage Restoration The Woodlands5.0 (3 reviews)
 Buckeye Valley Painting Contractors5.0 (16 reviews)
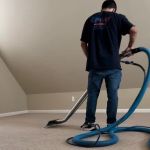 H2O Dry4.0 (10 reviews)
 Ace Elite Enterprises, LLC5.0 (2 reviews)
 Hauser Chem-Dry4.0 (219 reviews)
 ServiceMaster Cleaning & Restoration4.0 (20 reviews)
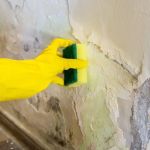 How to Remove Mold After Water Damage: A Comprehensive Guide
 How to Protect Your Home from Water Damage in a Flood Zone – Key Tips for Homeowners
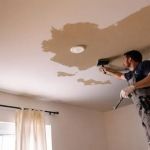 What to Do If Your Ceiling Is Sagging from Water Damage
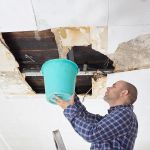 What You Need to Know About Handling Water Damage in Your Attic
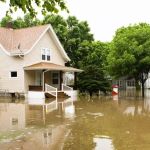 How to Handle Water Damage From Storm Flooding: A Comprehensive Guide
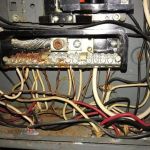 How to Repair Water-Damaged Electrical Systems Safely