
- 1. Why Water Damage Restoration Tools Are Important for DIY Projects
- 2. Essential Tools for Water Damage Restoration
- 3. How to Choose the Best Water Damage Restoration Tools
- 4. Step-by-Step Water Damage Restoration Process
- 5. Real-Life Case Study: DIY Water Damage Restoration
1. Why Water Damage Restoration Tools Are Important for DIY Projects
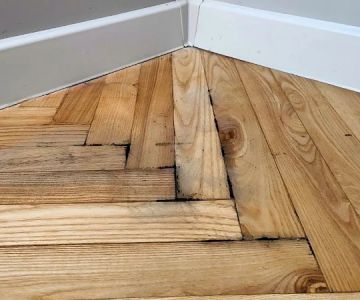
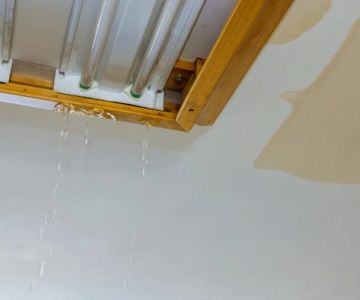
Dealing with water damage in your home can be a daunting task, especially if you're taking a DIY approach. The right tools are essential for efficiently managing and mitigating the damage caused by water, and using high-quality restoration tools can make all the difference. Whether you’re dealing with a small leak or a major flooding issue, having the proper tools can help you act quickly, minimize further damage, and restore your home to its original condition.
Water damage restoration tools are designed to remove moisture, prevent mold growth, and ensure that your property dries out completely. The right equipment can also help you assess the extent of the damage and determine which areas need professional attention. If you plan on tackling the restoration process yourself, it’s crucial to understand which tools you’ll need and how to use them effectively.

Kustom US Restoration / kustom restoration
1215 W Houston Ave Suite A, Gilbert, AZ 85233, USA
2. Essential Tools for Water Damage Restoration
Before beginning a DIY water damage restoration project, it’s important to gather the right tools. Below are some of the most essential tools that every homeowner should consider:

SERVPRO of Pompano Beach / servpro fort lauderdale south
Pompano BeachBroward CountyFlorida
2101 NW 33rd St #200a, Pompano Beach, FL 33069, USA
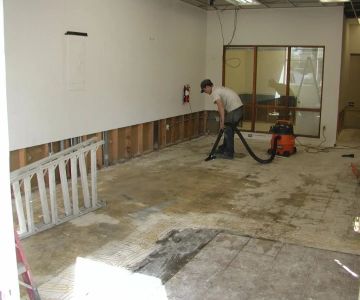
2.1 Wet/Dry Vacuum
A wet/dry vacuum is one of the most important tools when dealing with water damage. It allows you to quickly remove large amounts of water from your floors, carpets, and furniture. These vacuums are equipped with a special filter and strong suction to handle both liquid and solid debris. Make sure to choose a vacuum with high capacity to handle the volume of water you're dealing with.
2.2 Dehumidifiers
Dehumidifiers are crucial for drying out areas that have absorbed moisture. They work by removing excess moisture from the air, which helps prevent mold growth and speeds up the drying process. It's important to use industrial-strength dehumidifiers if you have a large area to dry, as smaller home units may not be effective in larger spaces.
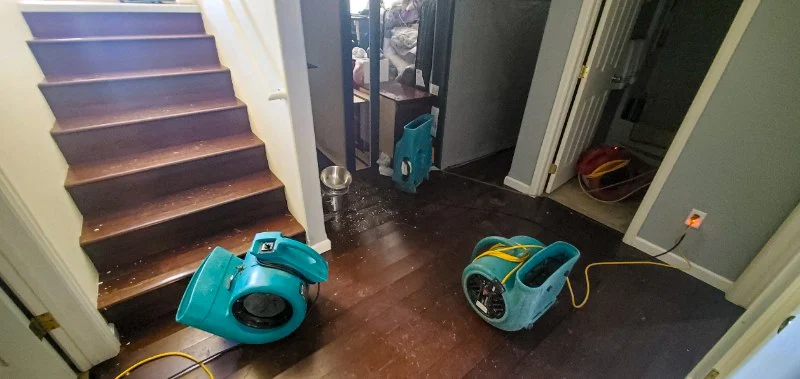
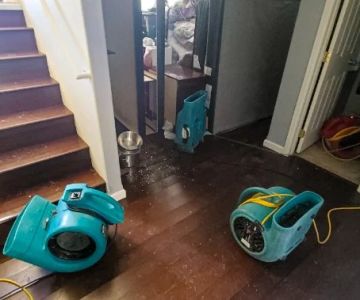
2.3 Air Movers and Fans
Air movers or high-powered fans are essential for circulating air and speeding up the drying process. These tools help evaporate moisture from surfaces, walls, and floors by increasing air circulation. Position fans and air movers in the right places to ensure maximum airflow, especially in areas that are particularly damp.
2.4 Moisture Meters
Moisture meters are essential for determining the extent of water damage in your home. These devices allow you to measure the moisture content in walls, floors, and other materials. They’re especially helpful in identifying hidden water damage, such as behind walls or under flooring. By using a moisture meter, you can ensure that every area affected by water is properly addressed.
2.5 Mold Removal Products
If water damage has led to mold growth, mold removal products are essential for eliminating harmful spores. While mold remediation often requires professional help for larger infestations, you can handle small mold problems with specialty cleaning solutions designed to kill mold and mildew.
3. How to Choose the Best Water Damage Restoration Tools
Choosing the best water damage restoration tools for your DIY project depends on the extent of the damage, the size of your space, and your specific needs. Here’s how you can make the right decision:
3.1 Assess the Scope of the Damage
Before purchasing any tools, assess the extent of the water damage. If it's a minor spill or a localized leak, you may only need basic tools like a wet/dry vacuum and a fan. For larger-scale flooding or widespread moisture damage, you’ll need more advanced equipment, such as commercial-grade dehumidifiers and air movers.
3.2 Research Tool Features
When selecting tools, research their features and capacity to ensure they meet your needs. For instance, check the size and capacity of dehumidifiers to ensure they can handle the square footage of your space. Look for vacuums with strong suction power and check the airflow ratings of fans and air movers to ensure they can dry your space effectively.
3.3 Budget and Cost-Effectiveness
Budget is an important factor when choosing water damage restoration tools. While high-end tools may offer more power and efficiency, you may be able to find a cost-effective solution that fits your needs. Consider renting large equipment like industrial dehumidifiers and air movers if you only need them for a short-term project, as buying them may not be cost-effective for smaller jobs.
3.4 Consider Long-Term Use
If you anticipate needing these tools in the future, consider investing in high-quality, durable equipment that will last for multiple uses. Tools with warranties or service agreements may be a good investment for long-term use. High-quality equipment can also be a valuable asset if you plan on tackling other DIY home improvement projects.
4. Step-by-Step Water Damage Restoration Process
To effectively restore your home after water damage, follow this step-by-step process:
4.1 Assess the Damage
Begin by inspecting the affected areas to determine the extent of the damage. Use your moisture meter to check for hidden water behind walls or under floors. Identify any areas that may need professional attention, such as structural damage or extensive mold growth.
4.2 Remove Standing Water
Use your wet/dry vacuum to remove standing water from floors, carpets, and other surfaces. Ensure that all excess water is removed before moving on to the drying phase. This will help prevent further water damage and reduce the risk of mold growth.
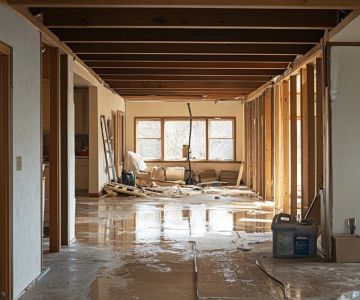
4.3 Dry the Area
Place dehumidifiers and air movers throughout the affected areas to dry out the space. Ensure proper airflow and monitor the humidity levels with your moisture meter. Depending on the severity of the water damage, this process can take anywhere from a few days to a week.
4.4 Clean and Sanitize
Once the area is dry, clean and sanitize all surfaces to prevent mold growth and bacteria buildup. Use mold removal products to treat any areas that show signs of mold and mildew. Consider using an antimicrobial solution to further ensure that your space is sanitized.
5. Real-Life Case Study: DIY Water Damage Restoration
John, a homeowner in Florida, faced water damage after a pipe burst in his basement. He decided to tackle the restoration process himself. Using a wet/dry vacuum, he quickly removed the standing water, followed by placing several industrial dehumidifiers and air movers in the affected area. John used a moisture meter to ensure all areas were completely dry before he began cleaning the surfaces.
After a few days of drying and cleaning, John’s basement was restored to its original condition. By using the right tools and following a structured process, he saved money and avoided the hassle of hiring a professional restoration service.
If you're dealing with water damage, you can find the best tools and equipment for DIY restoration at Reliable Damage Hub, where we offer a wide range of products and services to help you manage and prevent water damage in your home.
 Sage Restoration LLC4.0 (69 reviews)
 NewGen Restores Inc4.0 (113 reviews)
 Nat-Cat4.0 (49 reviews)
 JES Foundation Repair4.0 (885 reviews)
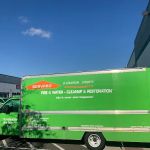 SERVPRO of Loudoun County, Leesburg4.0 (88 reviews)
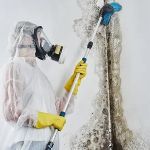 Unlimited Restoration, Inc. (URI) - Baltimore, MD Office4.0 (8 reviews)
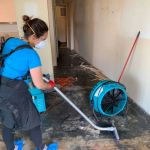 Water Damage Restoration for Industrial Offices
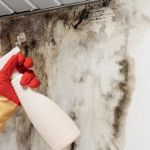 How to Handle Water Damage From Roof Leaks Effectively
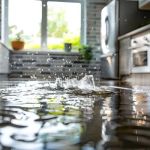 The Environmental Impact of Water Damage and Restoration: What You Need to Know
 How to Spot and Fix Water Damage in Your Walls
 How to Handle Water Damage From Burst Water Heaters: A Step-by-Step Guide
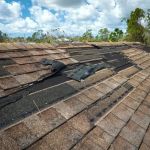 How to Handle Water Damage From Roof Flashing Failures