
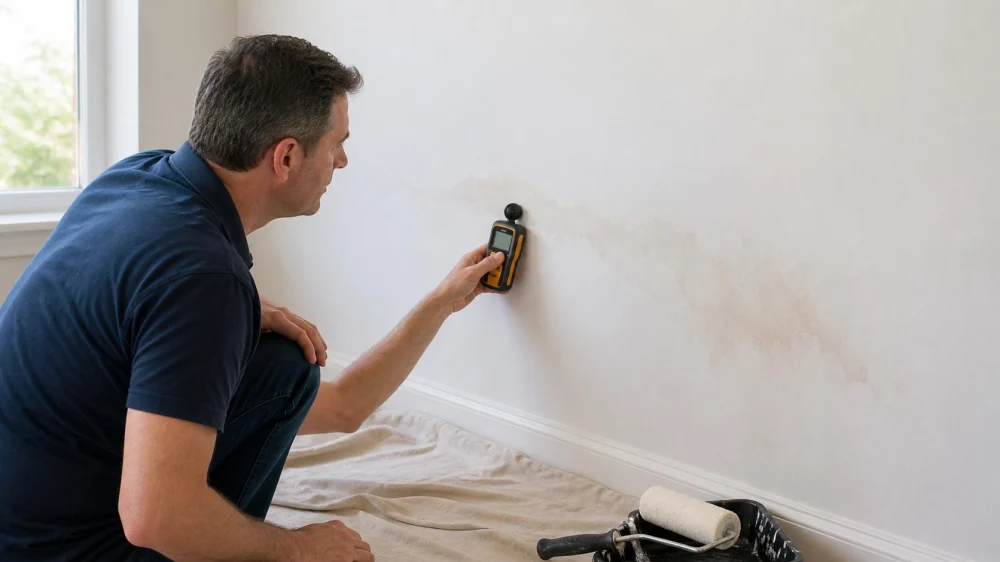
Water Stain Returns After Paint: Check Moisture First
On this page
Quick answer
A water stain that returns after painting is a signal to pause cosmetic work. The original discoloration may be bleeding through, or moisture may still be entering the wall or ceiling. Document the stain, compare it during dry and wet weather, and confirm the leak source and materials are dry before sealing or repainting. Active, hidden, or electrical-area leaks need professional assessment.
This guide is for United States homeowners inspecting an accessible wall or ceiling from a dry, stable floor. It is not for opening building assemblies, climbing onto roofs, touching wet electrical components, or handling suspected sewage, contaminated water, or extensive microbial growth.
Giants / dry kings restoration of san francisco
San FranciscoSan Francisco CountyCalifornia
685 Geary Blvd, San Francisco, CA 94102, USA
Why a water stain can return
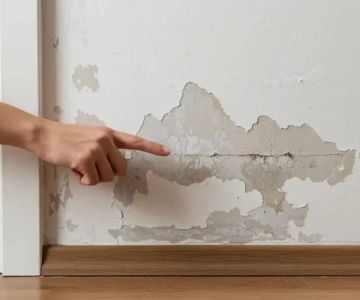
A returning water stain is discoloration that becomes visible again through a repaired or painted surface. It does not identify the source by itself. Two broad conditions can produce the same appearance: old staining migrates through ordinary paint, or the material is becoming damp again.
Possible moisture sources include:
- a roof, flashing, siding, window, or exterior joint that leaks during certain weather;
- a plumbing supply, drain, fixture, or pipe fitting inside or above the wall;
- condensation on a cold pipe, duct, or poorly insulated surface;
- water from an appliance, bathroom, or HVAC component in an adjacent area;
- ground or foundation moisture reaching a lower wall; or
- residual dampness trapped behind a surface that was repaired too soon.
Old tannins, rust-colored residues, smoke deposits, and prior water-soluble marks may also show through a new finish even after drying. That is a coating problem only after active moisture has been ruled out. Repeatedly adding paint before that decision can hide useful evidence, delay drying, and make the damaged area harder to evaluate.
SERVPRO of Pompano Beach / servpro fort lauderdale south
Pompano BeachBroward CountyFlorida
2101 NW 33rd St #200a, Pompano Beach, FL 33069, USA
Safe checks before repainting
- Stop painting and mark the boundary. Use removable painter’s tape beside the stain, not over wet or fragile material. Add the date and take a wide photo plus a close photo.
- Look for active water without touching it. Note droplets, a glossy wet edge, bubbling paint, softened drywall, sagging, peeling tape joints, or a stain that is expanding.
- Check timing. Record rain, snowmelt, plumbing use, bathing, laundry, appliance cycles, and HVAC operation. A repeatable timing pattern helps narrow the source.
- Inspect accessible adjoining areas. From safe flooring, look above, behind, and on the opposite side where access already exists. Check under a nearby fixture or cabinet without removing panels or disconnecting equipment.
- Compare odor and room conditions. Record musty or earthy odors without deliberately sniffing inside cavities. Note indoor humidity and whether the area has poor airflow.
- Use a moisture meter only as a comparison tool. A non-invasive meter can compare the stained area with nearby similar material. Follow its instructions and keep it away from wiring. A reading is not a laboratory moisture measurement or a leak diagnosis.
- Protect the area. Move undamaged belongings away if it is safe. Place a container only under an obvious drip that is clear of electricity and does not create a trip hazard.
- Arrange the right inspection. Choose a roofer, plumber, HVAC technician, building-envelope specialist, electrician, or water-damage professional based on the strongest clues.
Do not puncture a ceiling bubble, press on sagging drywall, or stand beneath a weakened area. Do not cut exploratory holes near unknown wiring or plumbing. If water is close to a light, outlet, switch, appliance connection, or electrical panel, keep away and obtain qualified help.
How to interpret moisture clues
A stain that grows during rain supports an exterior entry path, but the visible mark may be far from the roof or wall opening because water can travel along framing and surfaces. Ground-level observation cannot confirm a roof repair location.
A stain linked to fixture use may point toward plumbing or failed waterproofing. Stop using the suspected fixture if doing so is safe and practical, then ask a qualified professional to test the complete assembly. A dry period after stopping use is a clue, not proof.
A stain linked to cooling or cold weather can involve condensation, ducts, pipes, or HVAC drainage. The repair may require insulation, airflow, equipment, or humidity changes rather than simply patching the surface.
A stain that looks darker but meters similarly to nearby material may be residual discoloration, a coating compatibility issue, or a limitation of the meter. Pinless meters react to density, metal, salts, and material differences. Compare like with like and let a restoration professional confirm drying when the consequences of hidden moisture are significant.
A stain that stays unchanged is not automatically safe to paint. Confirm that the cause was actually corrected, damaged material is sound, and moisture conditions are normal across the affected assembly.
When to bring in a professional
Request prompt water-damage or trade-specific help when the stain expands, material is soft or sagging, water returns after the source was supposedly repaired, the area has persistent odor, or the leak may extend into insulation, flooring, or a wall cavity. Recurring leaks often need both source repair and drying verification.
Treat the situation as urgent when water approaches electricity, a ceiling is bulging, structural material appears unstable, or the water may contain sewage or other contamination. Keep people and pets out of the affected area. For water near energized equipment, an electrician or properly qualified responder should determine safe isolation.
Professional restoration is also useful when multiple rooms are affected, porous materials stayed wet, occupants have health vulnerabilities, or insurance documentation is needed. Ask how the contractor will identify the source, map moisture, define drying goals, monitor progress, and document materials that cannot be restored.
Do not hire on the strength of a single surface reading or a promise to “seal everything.” A sound scope distinguishes stopping the water, drying or removing damaged materials, verifying conditions, and completing cosmetic repair.
When the surface may be ready for repair
Repainting belongs near the end of the process. Before surface work begins, confirm:
- the water source has been identified and corrected;
- the affected assembly has been dried and, when warranted, verified;
- drywall, plaster, wood, insulation, and fasteners are sound enough to remain;
- no active staining, swelling, odor, or deterioration is progressing;
- repairs comply with product instructions and local requirements; and
- any contamination or microbial-growth concern has been addressed before coating.
For a confirmed dry, stable surface with residual discoloration, the coating manufacturer may specify cleaning, drying, a compatible stain-blocking primer, and finish paint. Test compatibility and ventilation requirements. Primer can isolate a mark; it cannot stop a roof, plumbing, condensation, or drainage problem.
Evidence and limitations
This guide follows common restoration practice: control the source, assess the extent, dry or remove affected materials, verify conditions, and then repair finishes. Paint appearance and consumer moisture-meter readings are screening information, not proof that concealed cavities are dry.
Building assemblies, climate, water category, material porosity, and local code affect the appropriate response. A qualified on-site professional can use material-specific measurements and inspection methods that a homeowner cannot reproduce safely. No drying time or mold conclusion should be inferred from color alone.
Frequently asked questions
Can a dry old water stain bleed through fresh paint?
Yes. Some residues can migrate through ordinary paint. However, treat recurrence as a moisture question first. Confirm the source was fixed and the material is dry before selecting a compatible stain-blocking system.
Does a darker stain always mean the wall is wet?
No. Lighting, coating sheen, old residue, and material changes can alter color. Conversely, concealed material may be damp without a dramatic surface change. Use multiple clues and professional verification when risk is meaningful.
Can I use a household fan to dry the wall?
Air movement can be inappropriate when water is contaminated, microbial growth is suspected, or the wall cavity remains wet. A fan also does not replace source control, dehumidification, or moisture monitoring. Ask a restoration professional before moving air across an uncertain area.
Should I open the wall to find the leak?
Not without checking for electrical, plumbing, structural, contamination, and hazardous-material risks. A qualified professional can select a safer inspection location and containment method if opening is necessary.
Who should I call first?
Use the timing and location clues. Rain-linked stains suggest a roofer or building-envelope specialist; fixture-linked leaks suggest a plumber; cooling-linked moisture suggests HVAC service. A restoration company can map affected materials, but the source trade may still be required.
Will insurance cover a returning water stain?
Coverage depends on the policy, cause, timing, maintenance history, and documentation. Photograph conditions, limit further damage when safe, keep invoices, and contact the insurer for policy-specific guidance. Do not delay urgent safety action while waiting for a coverage decision.
Next steps
Pause painting, photograph the stain, mark its boundary, and record when it changes. Keep away from sagging materials and wet electrical areas. Identify and correct the water source, then verify that the affected assembly is dry and sound before priming or repainting. If the stain grows, returns, smells, or involves hidden materials, arrange a qualified leak and moisture assessment.
 ServiceMaster South of the James, "Servicing more than 500 homes annually2.0 (4 reviews)
 A To Z Leak Detection4.0 (10 reviews)
 Diamond Drywall LLC5.0 (222 reviews)
 Able Construction LLC4.0 (15 reviews)
 Peerless Cleaning Services4.0 (43 reviews)
 All Dimensions Floor Care5.0 (6 reviews)
 How to Restore Water-Damaged Photographs: A Step-by-Step Guide
 How to Prevent Water Damage in Your Home: Expert Tips for Protection
 How to Prevent Water Damage from Heavy Snowmelt
 How to Restore Water-Damaged Entire Living Spaces Step by Step
 Water Damage Repair for Soggy Carpets: Tips and Tricks
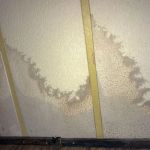 How to Restore Water-Damaged Sheetrock Without Replacement