
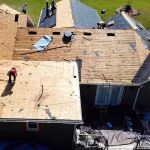
- 1-Identifying-the-Extent-of-Damage
- 2-Assessing-Structural-Integrity
- 3-Choosing-Appropriate-Repair-Methods
- 4-Drying-and-Preparation
- 5-Minor-Repairs-and-Patching
- 6-Treating-Stains-and-Preventing-Mold
- 7-Using-Waterproofing-and-Protective-Coatings
- 8-Professional-Tips-and-Tricks
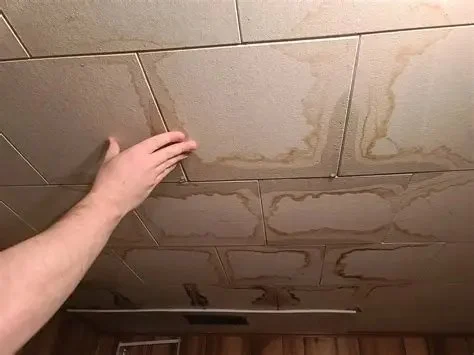
1. Identifying the Extent of Damage
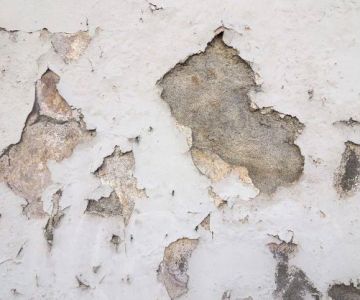
Before any repair work, it is essential to evaluate the extent of water damage in your basement ceiling. Visual inspection is the first step. Look for discoloration, sagging drywall, peeling paint, or damp spots. Detecting hidden damage behind insulation or ceiling tiles may require using a moisture meter or infrared scanner to locate areas of high moisture concentration.
Giants / dry kings restoration of san francisco
San FranciscoSan Francisco CountyCalifornia
685 Geary Blvd, San Francisco, CA 94102, USA
1.1 Signs of Hidden Damage
Even if water stains appear minor, structural elements like joists, beams, and insulation may be affected. Check for mold growth, musty odors, or soft spots in the ceiling, as these indicate deeper issues that must be addressed before cosmetic repairs.
Kustom US Restoration / kustom restoration
1215 W Houston Ave Suite A, Gilbert, AZ 85233, USA
1.2 Documenting the Damage
Take photos and notes of affected areas. This documentation helps in tracking progress and ensures no sections are overlooked during the repair process. It is also helpful for insurance purposes if you plan to file a claim.
2. Assessing Structural Integrity
Once damage is identified, determine if the ceiling’s structural components remain sound. Minor water stains may require only cosmetic attention, but sagging drywall, softened plaster, or weakened joists need immediate reinforcement.
2.1 Testing the Ceiling
Gently press on affected areas with a finger or small tool. If the material crumbles or feels spongy, it indicates compromised structural integrity. In such cases, targeted reinforcement or partial replacement may be necessary to avoid safety hazards.
2.2 Consulting Experts
For significant structural concerns, consulting a professional from Reliable Damage Hub ensures safety and avoids costly mistakes. Even for minor damage, expert advice can recommend the most efficient and durable repair techniques.
3. Choosing Appropriate Repair Methods
Not all water damage requires full ceiling replacement. Depending on the extent and type of damage, several repair options can restore the ceiling effectively.
3.1 Spot Repairs
For localized damage, patching drywall or plaster may suffice. Carefully cut out damaged sections, replace with new material, and blend the patch seamlessly with surrounding surfaces.
3.2 Repainting and Sealing
Minor water stains can often be treated by cleaning, applying stain-blocking primer, and repainting. This method is cost-effective and preserves most of the existing ceiling structure.
3.3 Reinforcement for Sagging Areas
If sections sag due to prolonged water exposure, install additional support with furring strips or braces before patching. This ensures long-term stability and prevents future issues.
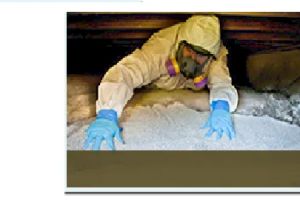
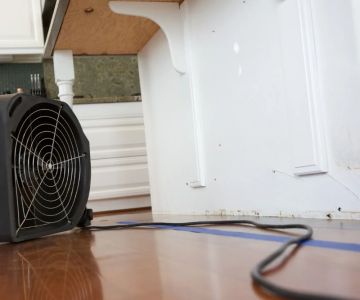
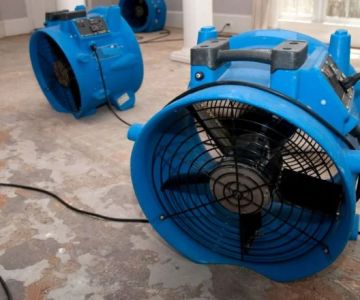
4. Drying and Preparation
Proper drying is critical before any repair. Moisture left in the ceiling can lead to mold, further deterioration, or failure of repair materials.
4.1 Using Fans and Dehumidifiers
Place fans or dehumidifiers in the basement to reduce moisture content. Allow sufficient drying time, which may take several days depending on humidity levels and material thickness.
4.2 Cleaning and Surface Prep
Remove peeling paint, loose debris, and mold using mild cleaning agents. Sand the area to ensure smooth surfaces for patching and painting. Proper preparation guarantees better adhesion and durability of repair materials.
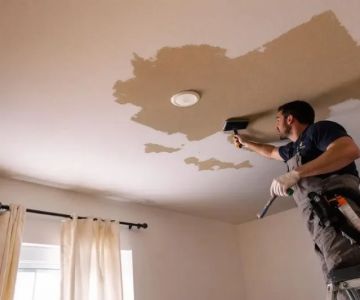
5. Minor Repairs and Patching
Once dry, minor repairs can be completed with patching compounds or drywall repair kits. This section focuses on restoring the ceiling without full replacement.
5.1 Filling Small Holes and Cracks
Use spackle or joint compound to fill small cracks and holes. Apply in thin layers, allowing each to dry before sanding smooth. This process reduces visible imperfections and prepares the ceiling for finishing.
5.2 Replacing Damaged Panels
For moderately damaged drywall panels, cut and remove the affected section, then install a new piece with screws or adhesive. Tape and mud the seams to blend with the surrounding ceiling. Finishing with primer and paint completes the restoration.
6. Treating Stains and Preventing Mold
Water damage often leaves stains and can encourage mold growth. Proper treatment ensures a safe and visually appealing ceiling.
6.1 Stain Removal
Apply stain-blocking primer to water marks before painting. This prevents discoloration from bleeding through new paint and restores a uniform appearance.
6.2 Mold Prevention
Treat any affected areas with mold inhibitors. Maintain good ventilation and monitor humidity levels in the basement. Mold-resistant paint or sealant can further reduce future risk.
7. Using Waterproofing and Protective Coatings
Applying protective coatings can extend the ceiling’s lifespan and prevent recurring damage.
7.1 Sealants and Waterproof Paints
Use water-resistant primers and paints to protect repaired areas. These coatings prevent moisture from penetrating and minimize the risk of future staining or structural damage.
7.2 Surface Reinforcement
Consider applying thin reinforcing layers, such as fiberglass mesh or elastomeric coatings, to areas prone to leaks or condensation. This adds durability without full ceiling replacement.
8. Professional Tips and Tricks
Experts from Reliable Damage Hub recommend focusing on early detection, proper drying, and incremental repairs. Addressing minor leaks promptly prevents larger issues, while using quality materials ensures lasting results.
8.1 Case Study: Rapid Patch and Restore
One homeowner noticed minor water stains in a corner of the basement ceiling. By removing the damaged drywall section, treating for mold, and applying patching compounds followed by waterproof paint, the ceiling was restored within two days without full replacement. This approach saved significant cost and time.
8.2 Long-Term Maintenance
Regular inspection of plumbing, gutters, and roof lines reduces the risk of ceiling water damage. Preventive maintenance combined with timely minor repairs ensures a basement ceiling remains intact and visually appealing for years.
For step-by-step guidance, product recommendations, and professional advice, platforms like Reliable Damage Hub provide trusted resources for homeowners. Implementing these techniques allows you to fix water damage in basement ceilings effectively without the expense of full replacement.

 Storm Hero Roofing & Restoration4.0 (19 reviews)
 Roto-Rooter Plumbing & Water Cleanup4.0 (811 reviews)
 AGH Commercial Inc.4.0 (43 reviews)
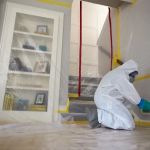 ServiceMaster Professional Restoration5.0 (13 reviews)
 BELFOR Property Restoration (San Jose)4.0 (6 reviews)
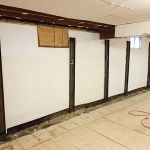 HELITECH Waterproofing & Foundation Repair4.0 (315 reviews)
 How to Fix Water Damage to Interior Components
 How to Deal With Water Damage After Sewer Backups: A Comprehensive Guide
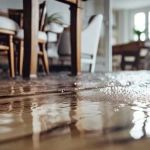 Water Damage Restoration for Apartments and Condos – Complete Guide
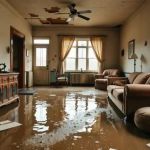 How to Manage Water Damage After a Hurricane: Restoration Tips
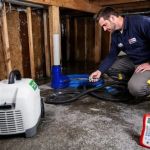 Water Damage in Crawl Spaces: Prevention and Repair Strategies for Homeowners
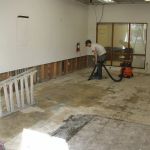 The Top 10 Water Damage Prevention Tips for Homeowners