
- 1. Understanding Water Damage in Walls
- 2. Sheetrock vs. Plaster Water Damage
- 3. Steps for Repairing Sheetrock Water Damage
- 4. Steps for Repairing Plaster Wall Water Damage
- 5. Preventing Future Water Damage
- 6. When to Call Professionals for Water Damage Repair
- 7. Why Choose Reliable Damage Hub for Your Repair Needs
1. Understanding Water Damage in Walls
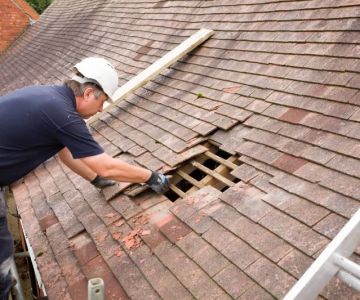
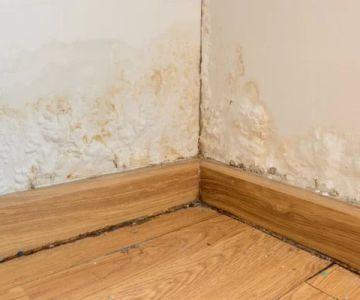
Water damage in walls, particularly in sheetrock and plaster, can occur for various reasons, such as leaks, flooding, or humidity issues. Left unchecked, water damage can lead to structural damage, mold growth, and deterioration of your wall materials. Early identification and prompt repair are key to preventing further complications.
When water infiltrates your walls, it compromises the integrity of the materials. Over time, this can lead to sagging, warping, and discoloration. Whether you’re dealing with a minor leak or significant flooding, understanding the type of wall you have—sheetrock or plaster—will help you determine the best course of action for repair.

Wizard Restorations Inc / puroclean of san fernando
Rancho CucamongaSan Bernardino CountyCalifornia
10245 8th St, Rancho Cucamonga, CA 91730, USA
2. Sheetrock vs. Plaster Water Damage
When it comes to repairing water damage, it’s essential to know whether your walls are made of sheetrock or plaster, as each material requires different techniques for repair. Let’s break down the key differences:

SERVPRO of Pompano Beach / servpro fort lauderdale south
Pompano BeachBroward CountyFlorida
2101 NW 33rd St #200a, Pompano Beach, FL 33069, USA
2.1 Sheetrock (Drywall)
Sheetrock, or drywall, is a more modern material commonly used in homes today. It’s relatively inexpensive, easy to install, and simple to repair. However, sheetrock is highly susceptible to water damage. When exposed to moisture, it can become soft, swollen, and prone to mold growth. If your sheetrock has been water-damaged, it may need to be replaced entirely if the damage is significant.
2.2 Plaster Walls
Plaster walls are often found in older homes and are more durable than sheetrock. However, they can be harder to repair. When plaster absorbs water, it may crack, peel, or become loose from the lath (the wooden slats that support the plaster). Although plaster is more resistant to water damage compared to sheetrock, it can still suffer from issues such as peeling or crumbling when exposed to prolonged moisture.
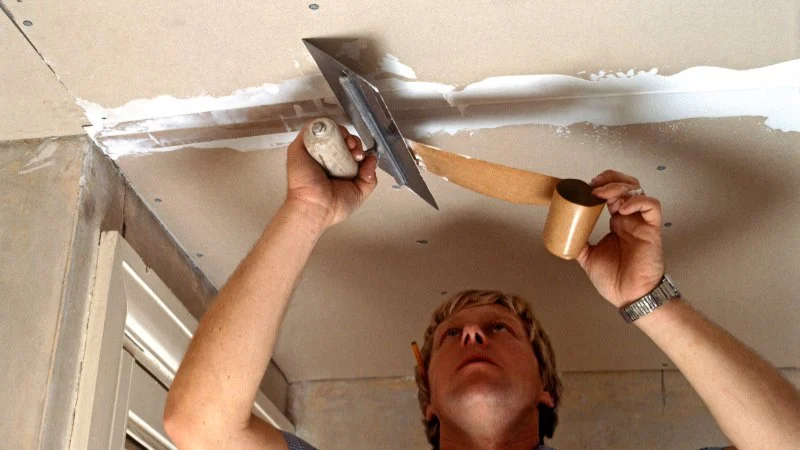
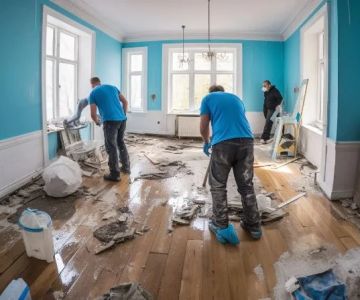
3. Steps for Repairing Sheetrock Water Damage
Repairing water-damaged sheetrock involves several key steps, from assessing the damage to performing the necessary repairs. Here’s a step-by-step guide:
3.1 Assess the Damage
The first step is to evaluate the extent of the water damage. If the sheetrock is soft, swollen, or discolored, it’s likely that the material is compromised. If the damage is severe (such as large sections of the wall being soaked), replacing the sheetrock may be necessary. If the damage is limited to small areas, you may be able to repair it yourself.
3.2 Remove the Damaged Area
Using a utility knife, cut away the damaged section of the sheetrock. Be sure to remove any mold or mildew that may have developed behind the wall. If the damage has extended behind the wall, you may need to remove more sheetrock to fully dry the area and prevent further mold growth.
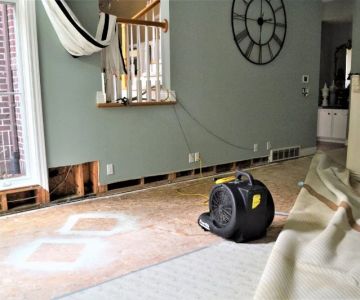
3.3 Dry the Area
Before replacing the sheetrock, ensure that the area is thoroughly dried to prevent mold from developing. Use fans, dehumidifiers, or heat to dry the exposed area completely. This may take several days depending on the severity of the water damage.
3.4 Replace the Sheetrock
Cut a new piece of sheetrock to fit the hole, and secure it with drywall screws to the studs. Be sure to match the thickness of the new sheetrock to the existing wall. After securing the sheetrock, tape the seams with drywall tape and cover them with joint compound. Once dry, sand the compound smooth.
3.5 Repaint or Refinish
After the joint compound has dried and been sanded, prime and paint the new sheetrock to match the rest of the wall. If necessary, repaint the entire wall to ensure an even finish.
4. Steps for Repairing Plaster Wall Water Damage
Repairing water-damaged plaster walls is a more intricate process than repairing sheetrock, but it’s still manageable with the right steps:
4.1 Inspect the Damage
Start by assessing the water damage. If the plaster is soft or crumbling, it may need to be replaced. If the plaster is simply cracked or peeling, you can often repair it without replacing the entire wall.
4.2 Remove Loose Plaster
Use a hammer and chisel to remove any loose plaster around the damaged area. Be careful not to damage the lath behind the plaster. If the damage is extensive, it may be best to remove all the plaster from the affected area and replace it with new plaster or sheetrock.
4.3 Apply a Bonding Agent
Before applying new plaster, use a bonding agent to ensure the new plaster adheres well to the existing lath. Follow the manufacturer’s instructions for the best results.
4.4 Patch and Refinish
Once the bonding agent has dried, mix and apply new plaster to the wall. Smooth it out and allow it to dry before sanding it to an even finish. You may need to apply multiple coats of plaster to fill in the damaged area properly. Once the final coat is dry, you can paint the wall to match the rest of your room.
5. Preventing Future Water Damage
Once you’ve repaired the water damage, it’s essential to take steps to prevent future issues. Here are some tips:
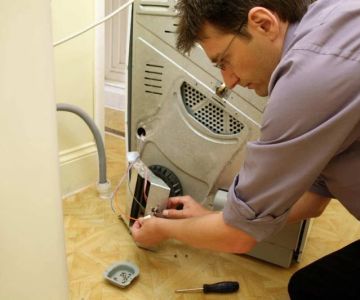
5.1 Fix the Source of the Water
Address the root cause of the water damage. If a leaking roof, broken pipe, or other issue was responsible for the water damage, have it repaired promptly to prevent recurrence.
5.2 Improve Drainage
Ensure that your home has proper drainage around the foundation. Clean gutters regularly to prevent water from overflowing onto your walls. If necessary, consider installing a sump pump or French drains to direct water away from your home.
6. When to Call Professionals for Water Damage Repair
If the water damage is extensive or if you’re dealing with mold, it’s best to call a professional repair service. Mold can develop quickly in damp conditions, and it can be difficult to eliminate without proper tools and expertise.
Professionals can assess the damage, determine the best course of action, and perform repairs safely and effectively. They can also help ensure that the water damage doesn’t lead to further complications, like mold growth or structural issues.
7. Why Choose Reliable Damage Hub for Your Repair Needs
At Reliable Damage Hub, we offer top-notch water damage repair services for both sheetrock and plaster walls. Our experienced team will ensure that your repairs are done right the first time, helping you restore your walls and protect your home from future damage.
Visit our website to learn more about our services or schedule a consultation for water damage repairs today.
 Good Roads Water Damage Experts5.0 (1 reviews)
 R&R Foundation Specialist4.0 (305 reviews)
 MJ White4.0 (102 reviews)
 ATI Restoration3.0 (25 reviews)
 Modernistic4.0 (251 reviews)
 ServiceMaster Cleaning Services4.0 (27 reviews)
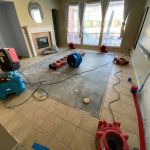 Water Damage Restoration for Retail Spaces – Expert Tips and Real Cases
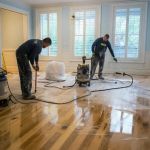 How to Prevent and Repair Water Damage in Commercial Properties
 How to Protect Your Home’s Electrical System from Water Damage: Essential Tips
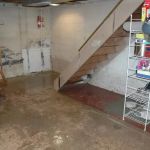 Flooded Basement? Here’s How to Restore It Safely
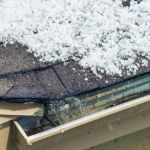 How to Handle Water Damage After a Storm: A Step-by-Step Guide
 How to Handle Water Damage from Burst Pipes: A Step-by-Step Guide