
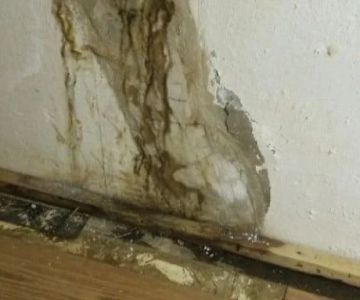
- 1 - Assessing the Damage
- 2 - Drying the Cabinets
- 3 - Cleaning the Cabinets
- 4 - Repairing and Refinishing
- 5 - Preventing Future Water Damage
- 6 - Case Study: Real-Life Water Damage Restoration
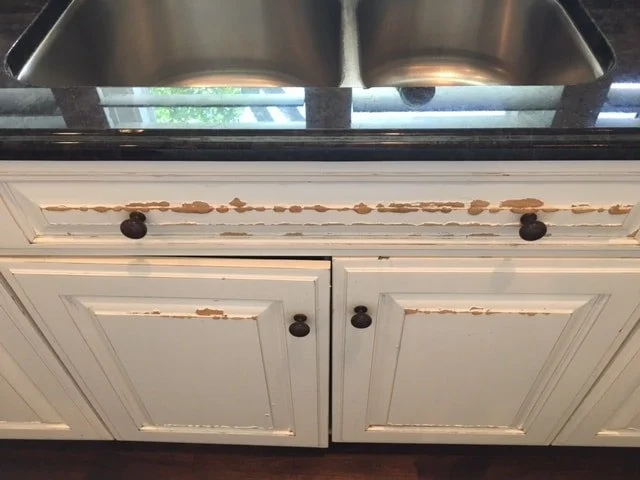
1 - Assessing the Damage
Before jumping into repairs, it’s crucial to assess the extent of the water damage. Start by checking for signs of warping, discoloration, or swelling in your kitchen cabinets. Water damage often causes wood to expand, and the finish can peel or bubble. Look for any mold or mildew that might have developed due to prolonged exposure to moisture. This initial inspection will guide you in determining whether the cabinets can be restored or need to be replaced.
If you notice severe damage such as wood rot or irreparable structural issues, it may be time to consult a professional. However, most cases of water damage can be repaired with the right tools and techniques.

Drip Restoration / valleywide restoration mesa az
932 S Stapley Dr, Mesa, AZ 85204, USA
2 - Drying the Cabinets
Once you've assessed the damage, the next step is to thoroughly dry the cabinets. If there’s standing water, use towels or a wet/dry vacuum to soak up as much as possible. Then, allow the cabinets to air dry completely. Use fans or dehumidifiers to speed up the drying process, especially if the damage is extensive. It's important to ensure that the cabinets are completely dry to prevent mold growth.
Remember, the drying process might take several days depending on the extent of the damage. Be patient, as this step is vital for the success of the restoration process.

SERVPRO of Pompano Beach / servpro of santa maria
Pompano BeachBroward CountyFlorida
2101 NW 33rd St #200a, Pompano Beach, FL 33069, USA
3 - Cleaning the Cabinets
Once the cabinets are dry, the next step is to clean them thoroughly. Water damage often leaves behind stains, dirt, and debris that need to be removed before proceeding with any repairs. Use a mild cleaner and a soft cloth to wipe down the surfaces. For stubborn stains, a mixture of water and vinegar or a wood cleaner can be effective. Avoid harsh chemicals that could further damage the wood.
Pay attention to the cabinet joints and edges where water may have seeped in. Use a toothbrush to clean out any dirt or debris in these areas to ensure a smooth surface for the next steps.
4 - Repairing and Refinishing
After cleaning, inspect the cabinets for any structural damage. If the wood is warped or swollen, you may need to sand the surface to remove imperfections. Once sanded smooth, apply a wood filler to any holes or cracks. Let it dry completely before sanding it down to match the surrounding surface.
Next, you’ll need to refinish the cabinets. Choose a stain or paint that matches the original color of your cabinets or gives them a fresh new look. Apply multiple coats, allowing each coat to dry before adding the next. For a more durable finish, consider using a clear topcoat or polyurethane to protect the wood from future water damage.
5 - Preventing Future Water Damage
To prevent future water damage, consider installing water-resistant finishes on your cabinets. Regularly check the plumbing and pipes under your sink, as leaks are a common cause of water damage in kitchens. Adding a moisture barrier around the cabinet base can also help protect against water exposure.
Additionally, consider using a sealant that will help repel moisture. This proactive step can greatly extend the life of your kitchen cabinets, keeping them in top condition for years to come.
6 - Case Study: Real-Life Water Damage Restoration
To illustrate the effectiveness of these steps, let’s look at a real-life example. One of our customers, Jane, noticed water damage on her kitchen cabinets after a plumbing issue caused a slow leak under the sink. The water caused the cabinets to swell, and there was visible discoloration on the wood. After following our restoration guide, Jane was able to restore the cabinets to their former glory. By assessing the damage, drying and cleaning the cabinets, and applying a fresh finish, her kitchen now looks as good as new. She also installed water-resistant finishes as an extra precaution against future leaks.
This success story highlights how simple, DIY steps can save you time and money when dealing with water-damaged cabinets. Jane’s case shows that with patience and the right approach, most water damage issues can be resolved without professional help.
 C2C Roofing & Restoration5.0 (31 reviews)
 SERVPRO of Downtown Minneapolis/Team Nitzsche0.0 (0 reviews)
 Rainbow International5.0 (1 reviews)
 APDR Construction & Restoration5.0 (35 reviews)
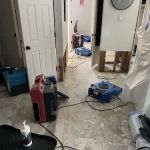 Aqua Damage Restoration LLC5.0 (28 reviews)
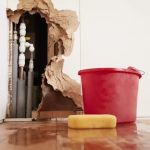 Top Restoration5.0 (8 reviews)
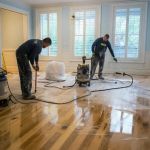 How to Prevent and Repair Water Damage in Commercial Properties
 Water Damage: How to Spot Early Warning Signs Before It’s Too Late
 Water Damage Repair for Water Heater Leaks: Comprehensive Guide and Tips
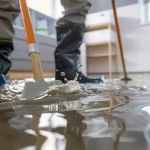 The Role of Water Restoration Companies in Preventing Further Damage
 Water Damage Restoration for Multi-Family Homes
 How to Handle Water Damage Claims With Your Insurance