
- -How to Identify Water-Damaged Paint and Wallpaper
- -Common Signs of Water Damage on Paint and Wallpaper
- -Effective Steps to Restore Water-Damaged Paint
- -How to Fix Water-Damaged Wallpaper
- -Real-Life Stories of Successful Restoration
- -Preventing Future Water Damage to Walls
1. How to Identify Water-Damaged Paint and Wallpaper
Water damage to paint and wallpaper can be subtle, and if left unnoticed, it can cause significant issues over time. Identifying the early signs of damage allows you to address the problem before it worsens. Here’s how to spot water damage on your walls and surfaces.
Giants / dry kings restoration of san francisco
San FranciscoSan Francisco CountyCalifornia
685 Geary Blvd, San Francisco, CA 94102, USA
1.1 Look for Discoloration and Stains
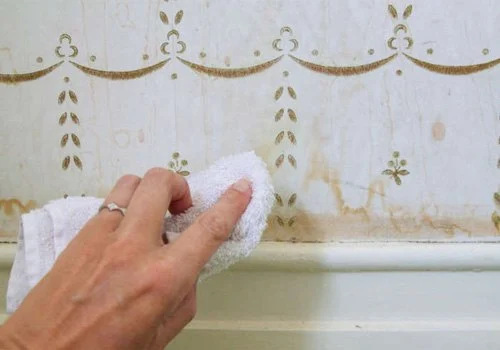
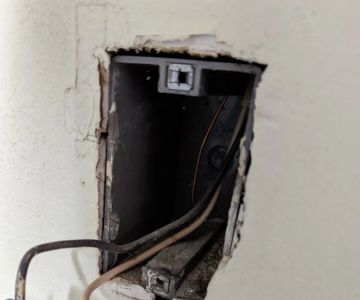
One of the most obvious signs of water damage is discoloration or staining on walls and ceilings. If the paint or wallpaper appears yellow, brown, or has visible spots, it is likely a result of water seeping through the material. These stains typically form after leaks in the roof or plumbing issues.

SERVPRO of Pompano Beach / servpro of santa maria
Pompano BeachBroward CountyFlorida
2101 NW 33rd St #200a, Pompano Beach, FL 33069, USA
1.2 Peeling or Bubbling Paint
Another common sign of water damage is peeling or bubbling paint. If the surface underneath the paint becomes wet, the paint may lose its adhesion and begin to peel off or bubble up. This usually occurs in areas affected by ongoing water leakage.
1.2.1 Wallpaper Issues
In wallpapered areas, water can cause the adhesive to break down, leading to peeling or bubbling. If you notice that your wallpaper is starting to come loose from the wall or that there are bubbles or wrinkles, this may be a clear sign of water damage.
1.3 Mold or Mildew Growth
In areas where moisture has been present for an extended period, mold or mildew can start to grow on the paint or wallpaper. Mold appears as black or green spots, while mildew is usually white or yellowish. If you see mold or mildew on your walls, it’s essential to act quickly to avoid health risks and further damage.
2. Common Signs of Water Damage on Paint and Wallpaper
Understanding the common signs of water damage will help you catch the issue early. Here are some common indicators that your paint or wallpaper has been compromised by water.
2.1 Water Stains on the Ceiling or Walls
Water stains on your ceiling or walls are often the first clue that something is wrong. These stains typically appear after heavy rain or plumbing leaks. Over time, the stain may spread and become darker, indicating the presence of moisture behind the wall.
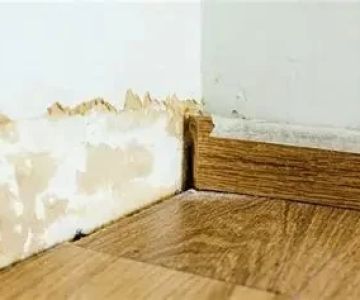
2.2 Soft or Sagging Walls
If your walls feel soft or sagging in certain areas, this could be due to prolonged water exposure. Water causes drywall to weaken, leading to soft or spongy spots. If you press on these areas and feel the material give way, it’s likely a sign that water has been damaging the surface for some time.
2.2.1 Wallpaper Lifting at the Edges
For wallpapered walls, water damage often leads to the edges of the wallpaper lifting off the surface. If you can peel the wallpaper back easily or see large gaps between the wallpaper and the wall, it’s a sign that water has affected the adhesive.
2.3 Damp or Musty Odors
A damp or musty odor in a room, especially near the affected walls, is another telltale sign of water damage. The moisture trapped behind the paint or wallpaper can lead to the growth of mold and mildew, which gives off a distinctive smell. If you notice such odors, it’s time to check for water damage.
3. Effective Steps to Restore Water-Damaged Paint
Restoring water-damaged paint is a fairly straightforward process, though it requires attention to detail to ensure the best results. Follow these steps to repair your water-damaged walls and restore the appearance of your home.
3.1 Dry the Affected Area
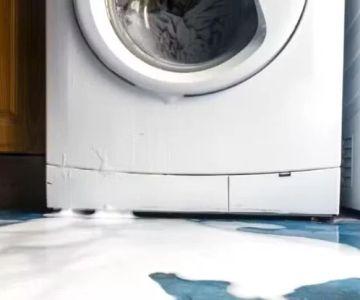
Before attempting to repair any water-damaged paint, you need to ensure that the affected area is completely dry. Use fans or dehumidifiers to dry the area thoroughly. If the damage was caused by a leak, fix the source of the leak first before proceeding with the restoration process.
3.2 Sand and Prep the Surface
Once the wall is dry, sand the damaged area to remove peeling or bubbled paint. You want to smooth out the surface to create an even base for the new coat of paint. If there are any holes or cracks, use filler to patch them up before sanding.
3.2.1 Cleaning the Surface
Before applying new paint, clean the area to remove any dirt, mold, or mildew. You can use a mixture of water and mild detergent or a store-bought cleaner to clean the wall. For mold or mildew, use a specialized mold remover to ensure the surface is clean and safe for repainting.
3.3 Repainting the Surface
After prepping the surface, apply a primer specifically designed for water-damaged areas. Once the primer has dried, apply a coat of high-quality paint. Depending on the size of the area, you may need multiple coats to fully cover the stain and restore the surface to its original appearance.
4. How to Fix Water-Damaged Wallpaper
Water-damaged wallpaper can be trickier to restore, but it is still possible with the right approach. Here’s how to fix wallpaper that has been affected by water damage.
4.1 Assess the Extent of the Damage
If the wallpaper is simply lifting or has bubbles, it may be possible to salvage it. If the damage is extensive, such as large areas of peeling or mold growth, it might be necessary to replace the wallpaper entirely.
4.2 Reapplying Wallpaper Adhesive
If the wallpaper is just peeling at the edges, carefully peel it back and reapply wallpaper adhesive to the affected areas. Press the wallpaper firmly against the wall, smoothing out any bubbles. Use a wallpaper roller to ensure it sticks properly to the surface.
4.2.1 Fixing Small Bubbles
For small bubbles, you can gently puncture the bubble with a pin and then apply adhesive underneath. Smooth out the bubble to remove any air and ensure it adheres properly to the wall.
4.3 Replacing Damaged Sections
If the wallpaper is too damaged to be repaired, you may need to replace sections of it. Carefully remove the damaged wallpaper and replace it with a new piece that matches the rest of the wall. Ensure the new wallpaper is applied evenly to prevent further issues.
5. Real-Life Stories of Successful Restoration
Sometimes, real-life stories provide valuable insight into how others have successfully restored water-damaged paint and wallpaper. These examples can help inspire and guide your own restoration process.
5.1 A Homeowner’s DIY Success
One homeowner shared how they restored their water-damaged paint after a plumbing issue caused leaks in their ceiling. By following the proper prep steps and using high-quality paint, they were able to restore their ceiling to its original look, saving money on professional repairs.
5.2 Wallpaper Restoration After a Roof Leak
Another homeowner faced wallpaper damage after a roof leak caused water to seep into their walls. By carefully reapplying adhesive and replacing small sections of wallpaper, they were able to repair the damage themselves and avoid the cost of a full wallpaper replacement.
5.2.1 Lessons Learned
Both stories demonstrate the importance of acting quickly when you spot water damage. With the right tools and techniques, most water-damaged paint and wallpaper can be successfully restored.
6. Preventing Future Water Damage to Walls
Once you’ve restored your water-damaged paint and wallpaper, it’s important to take steps to prevent future damage. Here are some preventative measures you can take:
6.1 Regular Roof and Plumbing Inspections
Ensure that your roof and plumbing are regularly inspected for leaks. Early detection of leaks can prevent water from damaging your walls and surfaces. Make it a habit to check for any signs of leaks after heavy rain or during routine maintenance.
6.2 Use Waterproofing Products
Consider applying waterproofing paint or sealants to areas prone to moisture. These products create a protective barrier that helps prevent water from seeping into the walls and causing damage.
6.2.1 Proper Ventilation
Ensure that your home is well-ventilated to reduce the buildup of moisture. Use fans and dehumidifiers in areas with high humidity, such as bathrooms and basements, to keep moisture levels under control.
By learning How to Identify and Restore Water-Damaged Paint and Wallpaper, you can maintain the appearance and integrity of your home. Whether you're dealing with minor water stains or major leaks, these tips and techniques will help you tackle the issue effectively. For more advice and restoration products, visit Reliable Damage Hub for all your needs.

 Clean Air Property Solutions5.0 (68 reviews)
 Roto-Rooter Plumbing & Water Cleanup4.0 (249 reviews)
 PIVOT Companies4.0 (21 reviews)
 VT 24 Hr Emergency Services0.0 (0 reviews)
 Rytech Restoration of North Fulton5.0 (1 reviews)
 Rainbow Restoration of Gadsden4.0 (83 reviews)
 What You Need to Know About Water Damage in Commercial Properties
 How to Repair Water-Damaged Floors in Your Home
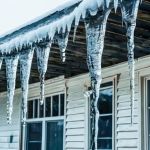 How to Prevent Water Damage From Roof Ice Dams: Tips for Protecting Your Home
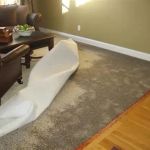 How to Restore Water-Damaged Upholstery - Expert Tips and Solutions
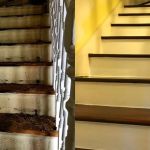 Water Damage Repair for Stairs and Railings
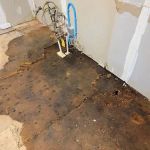 Water Damage Repair for Flooring Transitions: Expert Guide for Homeowners