
- 1. Understanding Water Damage Behind Drywall
- 2. Signs of Water Damage Behind Drywall
- 3. Identifying the Source of Water Damage
- 4. How to Repair Water Damage Behind Drywall
- 5. Tips for Preventing Water Damage in the Future
- 6. Real-Life Example: A Case of Water Damage Repair
- 7. Conclusion
1. Understanding Water Damage Behind Drywall
Water damage behind drywall can be tricky to identify and even harder to repair. Often hidden from view, it can cause significant structural issues in your home if left unchecked. This type of damage can arise from a variety of sources, including leaks from pipes, roofing issues, or condensation. Water can seep behind your drywall and cause mold growth, weakening the integrity of the wall and potentially spreading to other areas of your home.
If you suspect water damage behind your drywall, it’s crucial to act quickly to prevent further damage and more costly repairs. In this article, we will guide you through the process of identifying and repairing water damage behind drywall in your home.

Kustom US Restoration / kustom restoration
1215 W Houston Ave Suite A, Gilbert, AZ 85233, USA
2. Signs of Water Damage Behind Drywall
Water damage behind drywall is often hidden, making it harder to spot until it has already caused some level of damage. Here are some common signs that indicate water damage behind your drywall:

Wizard Restorations Inc / puroclean of san fernando
Rancho CucamongaSan Bernardino CountyCalifornia
10245 8th St, Rancho Cucamonga, CA 91730, USA
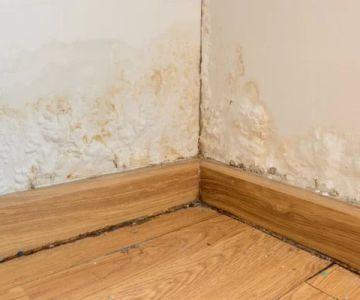
2.1. Discoloration or Stains
One of the most obvious signs of water damage is discoloration or stains on the wall. These can appear as yellow, brown, or even dark spots. If you notice such stains, it could be a sign of water leaking from a pipe or roof into the drywall.
2.2. Soft or Bulging Walls
If the drywall feels soft to the touch or starts to bulge, this could indicate that water has seeped in and is weakening the material. The drywall may start to sag or even crumble under the pressure of the trapped water.
2.3. Mold and Mildew
Water damage can create the perfect environment for mold and mildew to grow. If you detect a musty odor or spot visible mold on the surface of the drywall, it’s likely that there is hidden water damage behind the wall. Mold can spread quickly, so it’s important to address the issue as soon as possible.
2.4. Warped or Peeling Paint
Paint and wallpaper that is peeling or warping can also be a sign of water damage behind the drywall. The moisture from the water can cause the paint to lose its adhesion, leading to bubbles or peeling patches.
3. Identifying the Source of Water Damage
Before you can repair the damage, it’s essential to identify the source of the water. Without addressing the root cause, the damage may return or worsen. Here are some common sources of water damage behind drywall:
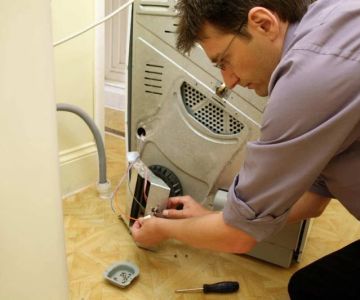
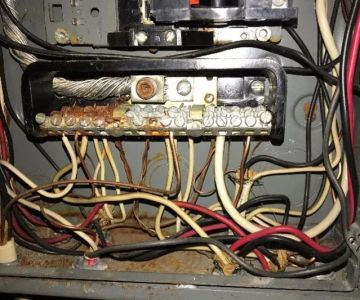
3.1. Leaky Pipes
One of the most common causes of water damage behind drywall is leaky pipes. If a pipe behind the wall is leaking, it can slowly drip water into the drywall, leading to damage over time. Check for any signs of leaks, including dripping water or higher water bills.
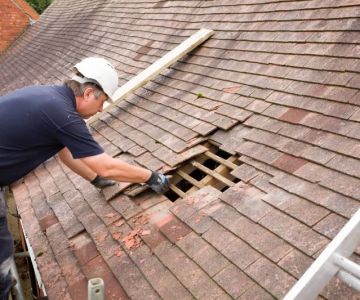
3.2. Roof Leaks
Water damage can also occur from roof leaks, especially if your roof is damaged by storms, age, or poor maintenance. Water can enter the attic or ceiling and travel down the walls, causing damage to the drywall. If the source is a roof leak, the damage may be more widespread.
3.3. Poor Ventilation
Sometimes, water damage occurs because of poor ventilation in areas like bathrooms and kitchens. Excess moisture from cooking or showers can accumulate behind the drywall, especially if the room is not adequately ventilated. This can lead to mold growth and drywall damage over time.
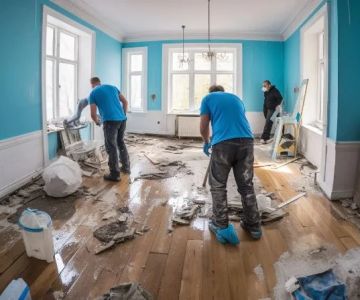
4. How to Repair Water Damage Behind Drywall
Once you've identified and located the water damage, it’s time to repair it. Here’s a step-by-step guide to repairing water damage behind drywall:
4.1. Turn Off the Water Source
The first step in repairing water damage is to stop the water flow. If the damage is due to a leaky pipe, turn off the water supply to your home. If it’s from a roof leak, you may need to temporarily cover the leak to stop the water from entering until the roof can be repaired.
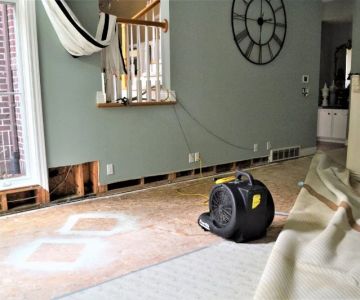
4.2. Dry the Area
Use fans and dehumidifiers to dry the affected area as quickly as possible. This will help prevent further damage, such as mold growth. The longer the area remains wet, the more likely it is that mold will develop behind the drywall.
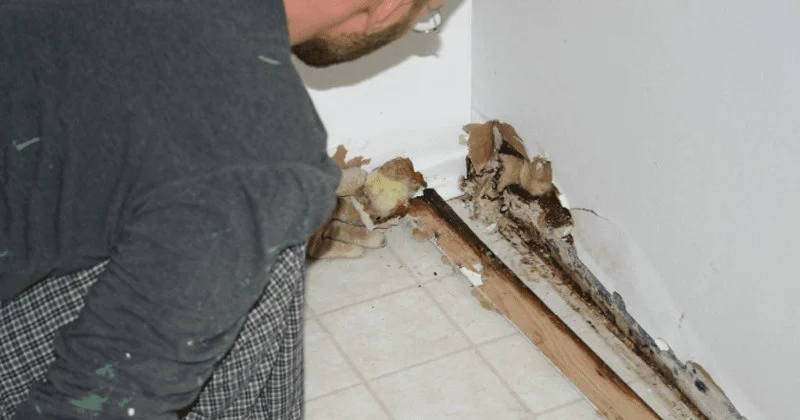
4.3. Remove Damaged Drywall
If the drywall is severely damaged, it will need to be cut out and replaced. Use a drywall saw or utility knife to remove the affected sections. Be sure to wear protective gloves and a mask to avoid exposure to mold spores or dust.
4.4. Repair the Source of the Leak
Before replacing the drywall, it’s essential to fix the leak. If it’s a pipe, you may need to patch the pipe or replace it. If the damage is from a roof leak, call a professional roofer to address the issue.
4.5. Replace the Drywall
Once the leak is fixed and the area is dry, you can replace the drywall. Cut new drywall to fit the opening and secure it in place with drywall screws. Afterward, tape the seams, apply joint compound, and sand it smooth.
4.6. Repaint and Refinish
Once the drywall is repaired and dry, repaint the wall with fresh paint. If you had wallpaper, you can reapply it at this point. Be sure to choose a mold-resistant paint to prevent future issues.
5. Tips for Preventing Water Damage in the Future
Water damage can be costly and stressful to repair, but there are steps you can take to prevent it from happening again:
- Regularly inspect your plumbing for leaks and have them repaired promptly.
- Ensure that your roof is in good condition and inspect it for signs of damage after storms.
- Use exhaust fans in high-moisture areas like bathrooms and kitchens to reduce humidity.
- Install water sensors or alarms near areas prone to flooding or leaks.
6. Real-Life Example: A Case of Water Damage Repair
In a recent case, a homeowner in Florida noticed yellowing stains on the wall behind their kitchen sink. Upon inspection, they discovered that a leaking pipe was slowly dripping water behind the drywall. After turning off the water supply and drying the area, they removed the damaged drywall and fixed the pipe. With new drywall installed and the leak fixed, the wall was restored to its original condition. The homeowner also took steps to inspect the plumbing regularly and installed water sensors to prevent future issues.
7. Conclusion
Identifying and repairing water damage behind drywall can be challenging, but with the right tools and knowledge, you can handle it effectively. The key is to act quickly, address the source of the water, and make the necessary repairs. For expert advice and high-quality products to help with your repairs, visit Reliable Damage Hub, where we offer everything you need to restore your home and prevent future damage.
 Good Roads Water Damage Experts5.0 (1 reviews)
 R&R Foundation Specialist4.0 (305 reviews)
 MJ White4.0 (102 reviews)
 ATI Restoration3.0 (25 reviews)
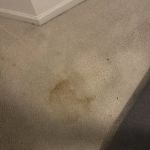 Modernistic4.0 (251 reviews)
 ServiceMaster Cleaning Services4.0 (27 reviews)
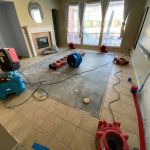 Water Damage Restoration for Retail Spaces – Expert Tips and Real Cases
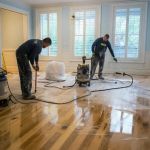 How to Prevent and Repair Water Damage in Commercial Properties
 How to Protect Your Home’s Electrical System from Water Damage: Essential Tips
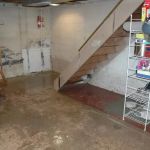 Flooded Basement? Here’s How to Restore It Safely
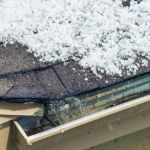 How to Handle Water Damage After a Storm: A Step-by-Step Guide
 How to Handle Water Damage from Burst Pipes: A Step-by-Step Guide