
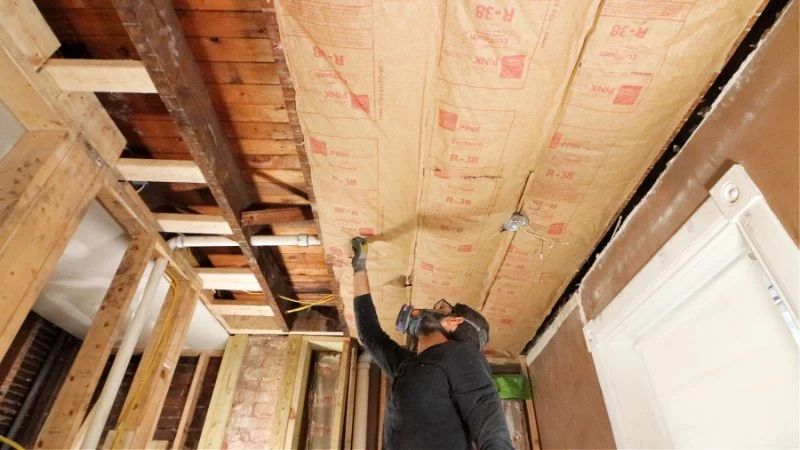
Understanding Ceiling Leak Damage and Wet Insulation Risks
When a ceiling leak happens, most homeowners first notice stains, dripping water, or bubbling paint. But the real hidden problem often lies above the ceiling—wet insulation. Learning how to dry out insulation after ceiling leaks is essential because insulation acts like a sponge, absorbing and trapping moisture deep inside your home structure.
SERVPRO of Pompano Beach / servpro of santa maria
Pompano BeachBroward CountyFlorida
2101 NW 33rd St #200a, Pompano Beach, FL 33069, USA
Why insulation becomes a hidden risk after leaks
Insulation materials such as fiberglass or cellulose are designed to trap air, not water. Once they become wet, their thermal efficiency drops significantly. Even worse, trapped moisture creates a perfect environment for mold growth, which can spread silently within walls and ceilings.

Kustom US Restoration / kustom restoration
1215 W Houston Ave Suite A, Gilbert, AZ 85233, USA
How ceiling leaks typically start
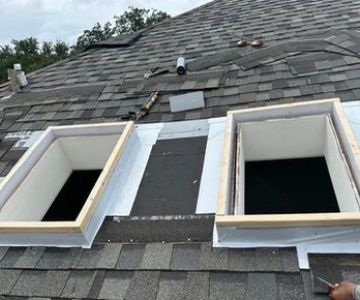
Most ceiling leaks originate from roof damage, plumbing failures, or HVAC condensation issues. In many U.S. homes, slow leaks go unnoticed for days or even weeks, allowing insulation to stay damp for extended periods.
First Steps After Discovering a Ceiling Leak
The first few hours after discovering a ceiling leak are critical. Quick action can significantly reduce long-term damage and make the insulation drying process more effective.
Stopping the source of water intrusion
Before focusing on insulation, it is important to identify and stop the source of the leak. This may involve temporarily patching a roof, shutting off a water line, or calling emergency repair services.
Protecting interior spaces immediately
Buckets, plastic sheets, and towels can help control water spread. While this does not solve insulation damage, it prevents secondary damage to flooring and furniture.
Why speed matters in water damage situations
The longer insulation stays wet, the higher the risk of structural damage and mold formation. Acting within the first 24–48 hours greatly improves recovery outcomes.
How to Dry Out Insulation After Ceiling Leaks Safely and Effectively
Understanding how to dry out insulation after ceiling leaks requires a careful balance of airflow, moisture control, and sometimes partial removal. Not all insulation can be saved, but early intervention can make a major difference.
Improving airflow and ventilation
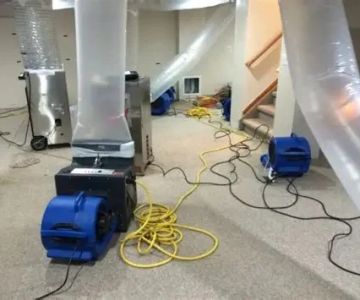
Air movement is one of the most important factors in drying insulation. Using fans, opening attic vents, and improving circulation helps moisture evaporate faster. Cross-ventilation is especially effective in attic spaces.
Using dehumidifiers for moisture control
Dehumidifiers help extract excess moisture from the air, reducing humidity levels in enclosed spaces. This accelerates drying and reduces the chance of mold formation.
When insulation can be dried versus replaced
Lightly damp fiberglass insulation may sometimes be dried successfully if addressed quickly. However, heavily saturated insulation often needs removal, especially if contaminated by dirty water or sewage.
Drying ceiling cavities properly
It is not enough to dry only the visible areas. Moisture often spreads into hidden cavities, requiring thorough inspection and consistent airflow for several days.
Mold Risk and Long-Term Moisture Control Strategies
One of the biggest concerns after a ceiling leak is mold growth. Mold can begin forming within 24 to 72 hours in damp insulation, making prevention a top priority.
Why mold spreads quickly in insulation
Insulation traps moisture and organic dust particles, creating an ideal breeding ground for mold spores. Once mold develops, it can spread into drywall and wooden structures.
Monitoring humidity levels in affected areas
Keeping indoor humidity below 50% significantly reduces mold risk. Hygrometers can help homeowners track moisture levels during the drying process.
Cleaning and sanitizing affected spaces
In some cases, antimicrobial treatments may be necessary to prevent mold growth. However, these should only be applied once the insulation is sufficiently dried or removed.
Homeowners dealing with persistent water damage often turn to resources like Reliable Damage Hub, which provides guidance on moisture recovery solutions and connects users with restoration services suited for different levels of ceiling leak damage.
Real Homeowner Case: Ceiling Leak and Insulation Recovery
A homeowner in Florida shared a situation where a small roof leak went unnoticed for nearly a week after heavy rainfall. By the time the issue was discovered, a large portion of attic insulation had absorbed significant moisture.
Initial discovery and hidden damage
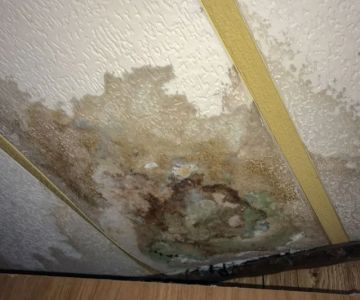
The first visible sign was a yellow stain on the living room ceiling. After inspection, it became clear that insulation above the ceiling had retained water, even though the leak had stopped.
Drying process and restoration efforts
The homeowner used fans, attic ventilation, and dehumidifiers continuously for several days. While part of the insulation was salvaged, sections that remained saturated were removed to prevent mold risk.
Outcome and key lessons learned
The key takeaway was that visible ceiling damage often represents only a fraction of the actual problem. Hidden insulation moisture required immediate attention to avoid long-term structural issues.
Common Mistakes Homeowners Make After Ceiling Leaks
Even with good intentions, many homeowners unintentionally worsen insulation damage due to lack of experience with water intrusion situations.
Ignoring hidden moisture inside ceiling cavities
Focusing only on visible water stains is a common mistake. Moisture often spreads beyond the visible area and remains trapped inside insulation layers.
Delaying drying efforts
Waiting too long before starting the drying process significantly increases mold risk and structural damage potential.
Using heat incorrectly
Some homeowners attempt to speed drying using excessive heat. This can damage materials and create uneven drying conditions, leading to trapped moisture pockets.
When to Dry Insulation vs When to Replace It
Not all wet insulation can be saved. Knowing when to dry versus replace is essential for maintaining home safety and efficiency.
Conditions where drying is possible
Clean water leaks that are caught early and involve minimal saturation may allow insulation to be dried and reused, especially fiberglass types.
When replacement is necessary
If insulation has been exposed to contaminated water, long-term saturation, or visible mold growth, replacement is usually the safer option.
Long-term cost considerations
Although replacement may seem expensive, it often prevents larger repair costs associated with mold remediation and structural damage.
Professional Restoration and Long-Term Home Protection
In many cases, professional restoration services provide the most reliable solution for water-damaged insulation and ceiling leaks.
Why professional assessment matters
Experts use moisture detection tools to identify hidden water pockets that are not visible during basic inspections. This ensures a more complete drying process.
Advanced drying equipment advantages
Industrial dehumidifiers, air movers, and thermal imaging tools allow professionals to dry insulation more effectively and safely than typical household methods.
Preventing future ceiling leak damage
Regular roof inspections, plumbing maintenance, and attic ventilation improvements can significantly reduce the risk of future leaks.
Homeowners seeking reliable guidance or restoration support often consult platforms like Reliable Damage Hub, which helps connect them with practical solutions for water damage recovery and insulation restoration strategies tailored to real home conditions.

 DRYmedic Restoration Services5.0 (23 reviews)
 Badgerland Restoration & Remodeling Inc. - Wisconsin Rapids5.0 (26 reviews)
 Eco Restoration & Cleaning Services5.0 (9 reviews)
 Stanley Steemer4.0 (4024 reviews)
 Quick-Brite4.0 (10 reviews)
 PuroClean of Massapequa5.0 (21 reviews)
 Water Damage Repair for Bathroom Flooring and Tile in the USA
 How to Restore Water-Damaged Personal Items
 How to Safely Remove Standing Water From Your Home
 How to Restore Water-Damaged Laminate Countertops Step-by-Step Guide
 Water Damage Restoration for Multi-Family Homes: A Comprehensive Guide
 How to Restore Water-Damaged Tile Floors | Expert Repair Guide